
Tim Parkin shares the daunting experience of planning a first ever exhibition

Tim Parkin
Amateur Photographer who plays with big cameras and film when in between digital photographs.
Photography exhibitions are fairly rare in this country. The venues that could typically host such exhibitions are usually dedicated to painted works and if you've tried to find an appropriate space yourself you've probably discovered that they get booked up for at least a year in advance.
So I was very surprised when I got a phone call on the second day of 2014 asking me if I would like to have an exhibition at the Ryedale Folk Museum - an exhibition space that has played host to Tate exhibitions including works by Henry Moore and Barbara Hepworth.
I was obviously not going to look a gift horse in the mouth and said yes immediately - I thought I’d figure out everything else later. A few minutes later I was told I’d be hanging the exhibition on the 9th of February and the room was 10m by 4m and I had it all to myself !! OK, time for some planning methinks.
Now I know a lot of people reading this will already have had an exhibition of some sort but as I know I'm going to have to put a fair bit of work into the preparation and planning of this I thought it would be good to share my experiences and talk to a few other photographers who have had exhibitions and ask for their advice.
For now, this is the first of a mini diary of the exhibition planning and execution and hopefully, I’ll share some of the things I learn from experience or other people along the way.
Planning a photography exhibition
To begin the process I made a list of things I would need to think about and here are the main points.
1) Have a good look at the space
2) Meet the gallery staff/exhibition organiser
2) Work out how many pictures
3) Work out how to present them
4) Choose the pictures
5) Work out the ordering/grouping
6) Print the images
7) Finalise the hanging system plans
8) Work out any supporting materials (cards, posters, etc)
9) Figure out how cheap you can buy the wine for the launch event to offset print costs…
OK, number nine wasn’t a worry yet but we’ll start at the first item in the list and work down.
Have a Good Look at the Space
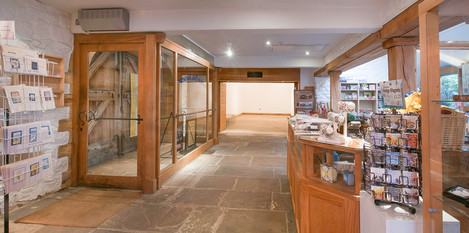
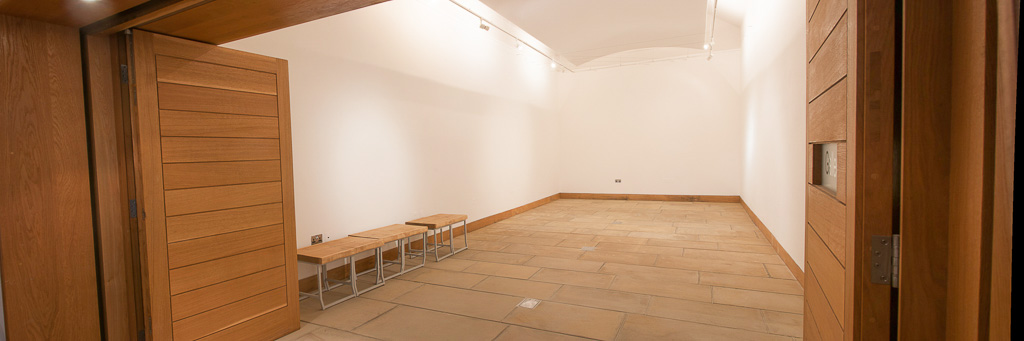
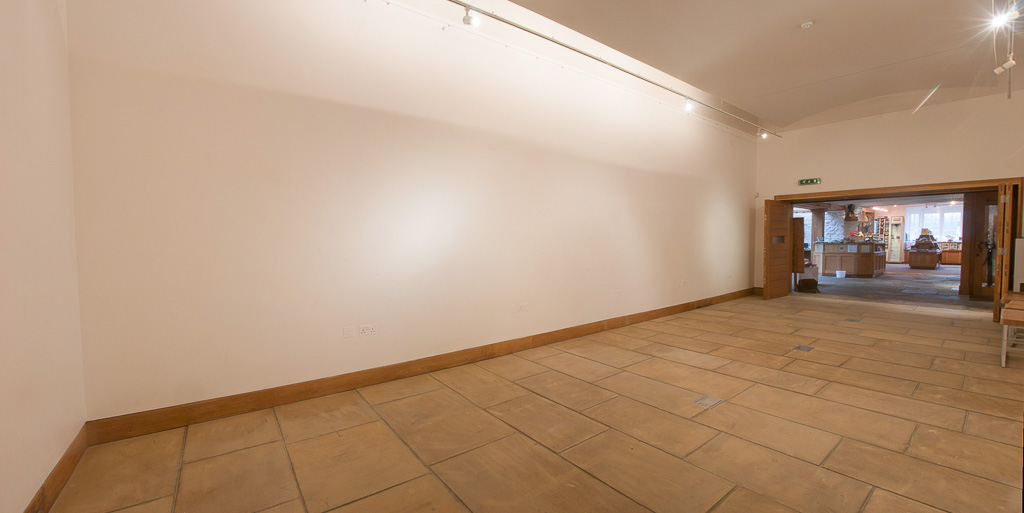
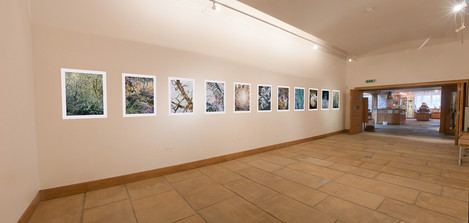
The great news here is that the space is wonderful - it’s a professionally built exhibition space with full climate control if needed; Off white walls and a stone floor with a gallery hanging system and permission to fix things to the wall if needed. The lights provide high angle floodlighting across the walls with very few hotspots. Whilst there I got the measurements of the room and we do indeed have 10m by 4m to play with.
I took along my Sony DSLR with a nodal slide to allow me to make panoramas. The following pictures were stitched in PTGUI. I also made a simple plan of the room and mocked up the wall space (you’ll see what I mean from the pictures below).


Meet the Gallery Staff / Exhibition Organiser
You may not have carte blanche to do what you like with the exhibition and so a good chat with the people organising it will help get expectations managed. In my case, I spoke to Jennifer Smith who has taken over running the Ryedale Folk Museum and asked if she had any particular theme in mind - possibly a Yorkshire Moors theme? Fortunately, the opposite was true and there was an expectation that the exhibition would demonstrate that the space is more diverse than just regional art. This helped as it meant I did have a lot of leeway in what I could exhibit.
We talked about ideas for the show and I broached the problem that I was going to struggle to get enough prints framed for the exhibition and asked if ‘alternative’ hanging was OK - I had in mind using wire and clips as I had seen this done to great effect at David Ward’s and Anna Booth’s show at the OXO Gallery in London and also at a show at Somerset House.
The other aspect mentioned was having a showcase image at the end of the room to draw people into the area. I’ll come back to that later.
Work out how many pictures
Well, it’s a big room that is for sure and I’ll want some large(ish) images to make sure they don’t get lost in the space. I have a 17” printer at home which would probably be just about OK if I was printing edge-to-edge and then adding a matt and frame. However, if I’m just hanging the prints as paper on a rail system the paper has to have a border around it and so a 17” print would need to have about a 14.5” image on it which doesn’t really make a very big print.
I realised I would have to go up to a 24” printer to get a decent size for the room which would give me 20” x 24” image sizes with a 2” paper border.
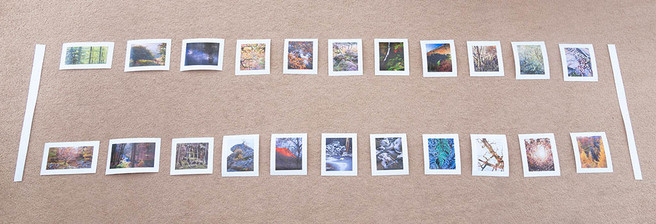
In order to work out how many images I could fit in with this, I printed out all of my images using the contact sheet option in Lightroom so that the width of the image was consistently 5” wide (which is the 20” wide we talk about above at ¼ scale although for a couple of panoramic shots this created images that were a bit too big so I set an arbitrary upper limit). I then cut all of these to size so that they had ½” borders (2” borders at ¼ scale). In other words, I was making a mock up of the space at 1/4 scale and seeing what happened.
I could then find a nice 2.5m space on the floor and mark the ends with strips of some sort to mark the end of the walls - offcuts of paper from the contact sheets worked a treat. A quick check showed that I would have to produce approximately 22 images on 24” paper.
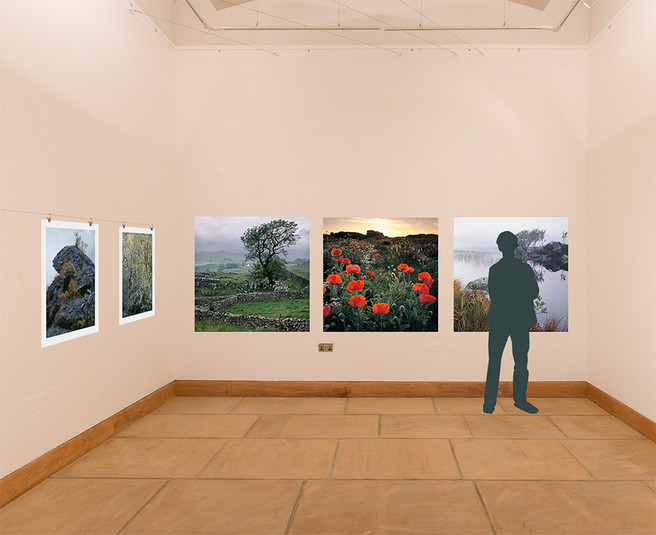
You can see a photo of these further down this article where I talk about working on the order of the images. I also then mocked up the space using Photoshop as you can see below.
As for the end wall, the goal was to create as big an impact as possible with a showcase image to draw attention in the middle. I decided to use the Bamburgh poppies and lupins image which has some wonderful rich reds to catch the eye and I also decided to book it with a couple of other shots that would look very nice at size - a 10x8 shot of Winskill and a 4x5 shot of Rannoch Moor.
Work out how to present them
I looked around at the types of frame or mounting solutions available and decided that my ‘rolls royce’ solution would be acrylic faced dibond but that it was too expensive to get very large prints and I would only really be able to manage 30” prints and even then they would still cost a lot. Fortunately, I contacted Jeff Heads at Digitalab after seeing Joe’s prints and also David and Angie Unsworth’s prints from them and Jeff was able to help with a package price for the exhibition in return for promoting Digitalab alongside the prints. In return, he would “see what he could do” for print size. I’m hoping we can hit 40” square - fingers crossed.
As far as the bare paper images were concerned I was originally going to print them at Joe Cornish’s and use Fotospeed Smooth Cotton 300 but timetables meant that this would be tough to organise. Fortunately, I had to visit Dav Thomas to work on some colour profiling for monitors and printers for his Triplekite Publishing business and he was amenable to me using his printer to produce the 24” prints.
The difficulty here is that the printer is set up with photo black ink and hence normal rag papers were out. Dav recommended Ilford Galerie Gold Fibre Silk or Crane Museo Silver Rag.
My main worry about printing was the potential curl of the paper once hung. It would be ideal if you could get hold of 24” wide paper in cut sheet form but the only supplier that does this is Crane Museo and nobody has it in stock. David Ward and Anna Booth had hung their exhibition using roll paper and the tension from having a wire top and bottom seemed to be enough to keep things from getting too much of a curl. At the moment I’m tending to the Crane Museo Silver Rag on Dav’s recommendation.
Choose the pictures
Well that sounds easy doesn’t it - just choose some pictures; how hard can it be… Well as it turns out picking the images you like isn’t the hard part, it’s picking the images you aren’t going to show that is the issue. 22 images out of 400 I’ve taken over the last four years. That’s quite a lot of images to be left out!
One of the obvious things to do was to ask other people which images they thought I should include. Asking them to look through all 400 would be a little too much and also the choice of images is a personal thing - if I let other people choose then they don’t represent my personal choices.
The compromise was that I would choose about 60 images that I felt worked and that represented what I thought of as ‘my work’ (i.e. they weren’t off the wall or shots taken just because I was somewhere beautiful - e.g. I have beautiful vista images from various locations taken because the combination of light and location worked so well that it was a pleasure to use the camera. They weren’t images that I really saw as part of the type of photography I produce normally (that could just be a result of the terrible weather I normally get though!).
I then I would ask a range of people for their choices. I prepared a lightroom gallery of my 60 images and uploaded them to the web and solicited the opinions of a range of people from family members to contributors to the magazine. This ended up with a good 11 or 12 images that were consistently chosen by everyone and then four or five that got a good approval. Out of the remaining, there were a couple that I really wanted to include as they were personal favourites. That gave me 18 images from a potential 22 with a shortlist of about 10 left that got a fair few ‘votes’.
Work Out ordering and Grouping
For this stage I went back to the small prints I had made whilst working out how many prints and just left them arranged on the floor (much to Charlotte’s dismay!) and kept rearranging them until I was happy. If I struggled, I had the shortlist from which I could swap some images.
At this point, I asked visitors to the house if they thought images didn’t work in the display or they could be reordered and whether they’d include some I’d left out or vice-versa.
I’ll talk through my choices in the next issue when I’ve actually finalised them.
So at the moment, we’re almost at the point where the photos are going to be printed and starting to get the promotional activities going. More about all that in the next issue!
If you have any questions about exhibition planning or execution feel free to ask them below and I'll try to address them in the future instalments of this series.