
Tricks with Luminosity Masks

Tim Parkin
Amateur Photographer who plays with big cameras and film when in between digital photographs.
I’d like to talk about a technique I’ve been playing with for about the last year. It first came about when I started to post process colour negative scans for the film scanning business I run. Quite often a good default start for a negative scan is something quite low in contrast which you then give life to afterwards by increasing contrast either globally or locally.
If you want to make colour negative film look a bit like a transparency film with good colour separation and a punchy saturation, this means increasing the contrast quite a lot, which can have a few nasty side effects. For quite a while I was struggling with making this look natural but I finally twigged one day when I was comparing some shots I had taken on transparency film (Velvia) as well the shots on colour negative (Portra for instance) that the post processed colour negative work had too much saturation in the shadows. The very dark and saturated colours just looked unnatural. When I was recently looking into colour gamuts (at least in print I can’t pronounce it incorrectly) I also noted that it is quite often dark colours that go out of gamut in real world pictures.
I’ve also recently been processing some D800 files and noticed the same issue. This became particularly problematic when printing, as highly saturated dark colours can look very odd on paper. I realised that again this wasn’t a problem when printing from transparency film and after some checking found that transparency doesn’t have as saturated deep shadows (a generalisation, but a useful one in this instance).
Having discovered this I then had the challenge of just how to desaturate the shadows in a picture. Fortunately, I’ve written about a process that could address just this problem in a previous issue of On Landscape.
Luminosity Masks
In Issue 34 I wrote about the use of luminosity masks but the article might have been a bit ‘in at the deep end’ so I’ll recap again. It’s worth having a look at my general article on masks if you’re not familiar with the way that they work in general here.
The idea is that you can have a black and white mask associated with a layer in photoshop where white areas in the mask let the image through and black areas in the mask block the image (with mid-grey areas only letting 50% of the brightness of the image through).
Luminosity masks are a copy of the brightness of the image into a normal mask so bright parts of the image become light areas on the mask and dark areas of the image become dark areas of the mask.
How do we get the image brightness into the mask though? Well, there is a nice button in the photoshop channels pallete that coverts an images luminosity into a selection. Once you have the selection you can use the layers menu to ‘add mask > show selection’ and you have a typical luminosity mask.
Shadow Selection
We don’t want the highlights selected though - we want just the shadows selected. Well the really, really useful thing to know about masks is that they are just another image - albeit black and white. This means that if you have the mask selected you can make adjustments to it just like any other image.
So the first thing we’ll do is click on the mask and use ‘image > invert’. This means the deep shadows are not being masked and the bright highlights are.
The next step is the tricky one to think about. We want make sure that the mask is only affecting the deeper shadows in a picture. We can do this by using the curves or levels adustment. What we will do is to clip the blacks by lifting the black point in the mask.
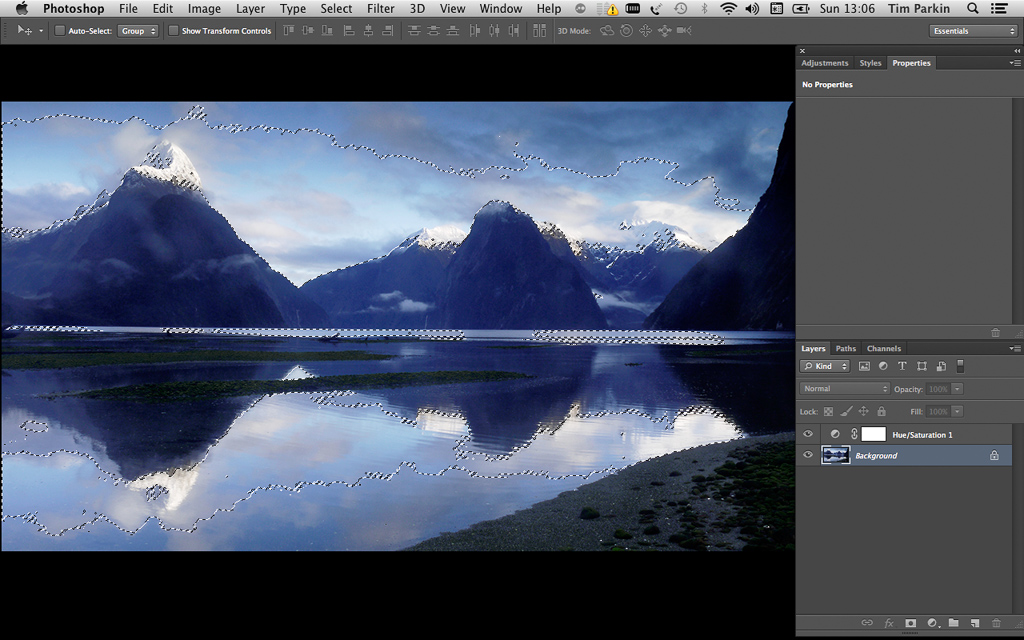
This is easier to show in a set of images than in text so here goes. This is a photo taken by David Ward on a Panasonic GF2 in Milford Sound under some spectacular morning conditions.
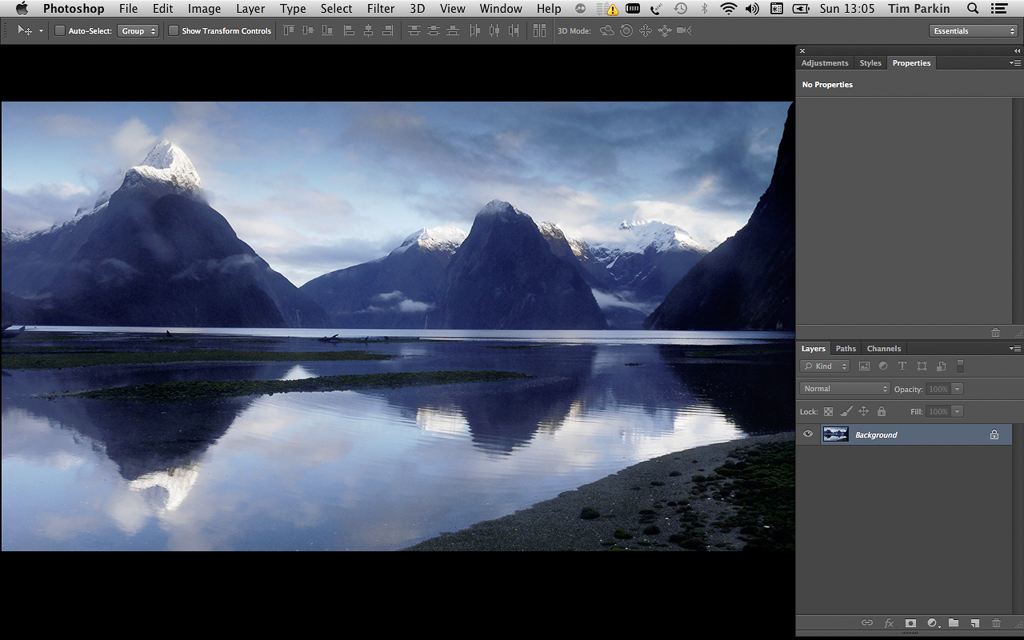
If we increase the saturation in the shot (a not uncommon thing to do I would imagine) colour in the shadows becomes far too intense and your natural reaction would be to wind the saturation back again.
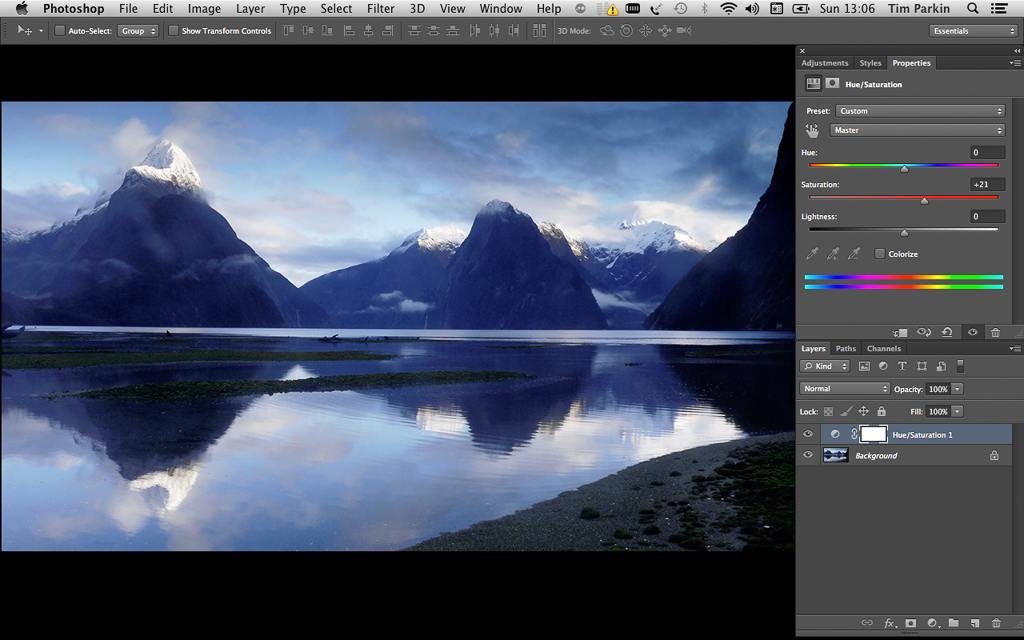
But instead of winding the whole saturation back we're going to make a selection for the shadows in the next few frames. Firstly make sure we have the RGB channel selected on the channels palette.
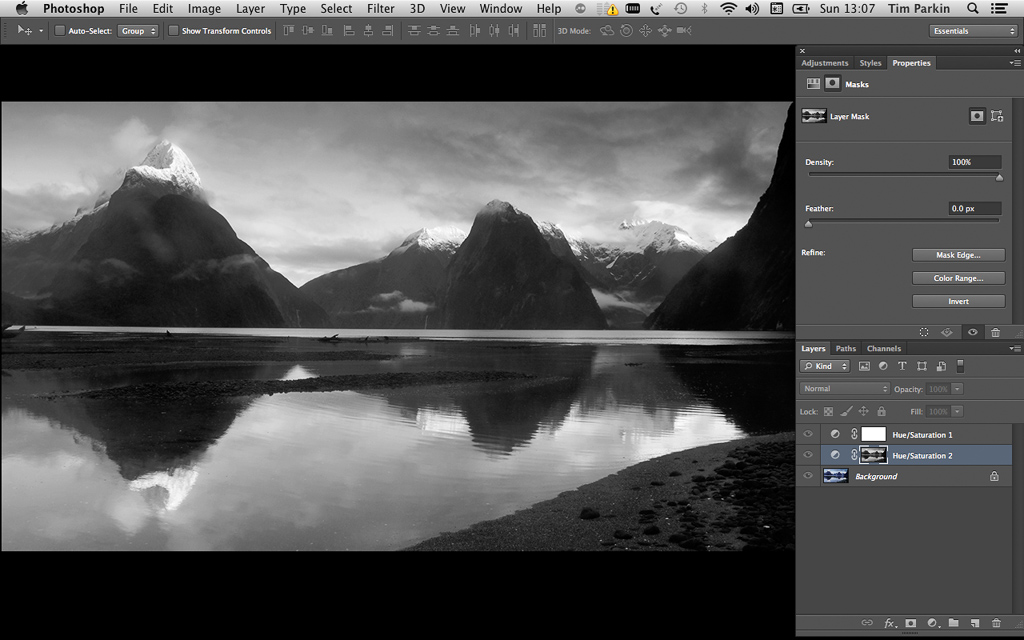
And then we can click on the dotted circle in the bottom of the channels palette that has the tooltip "load channel as selection". This creates a selection that is 100% where the RGB is 100% and 0% where it's 0%.
We can then just add a hue/saturation adjustment layer and the selection automatically gets converted into a mask. To confirm that this has worked and to help us work on the layer we can "Alt" click on the layer mask which will bring it up as a black and white image.
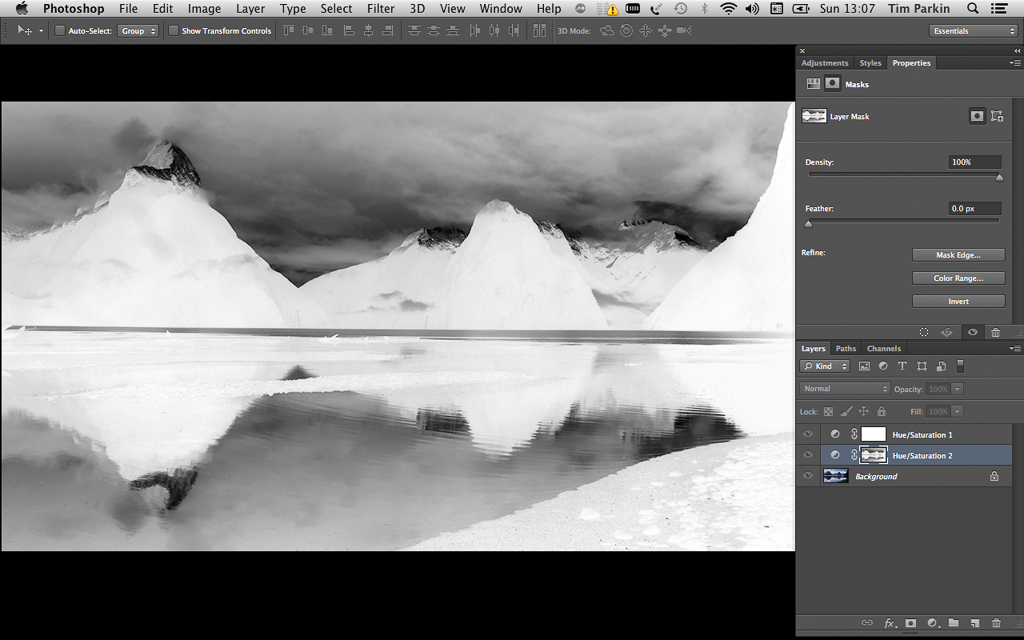
The most powerful thing about using masks in photoshop, as has been mentioned in the previous article, is that you can use adjustments on the mask itself. At a basic level this is quite nice as we can invert the black and white mask so that now it is 100% selected where the RGB layer is 0% and 0% where it is 100%. In other words we now have a luminosity mask for the shadows!
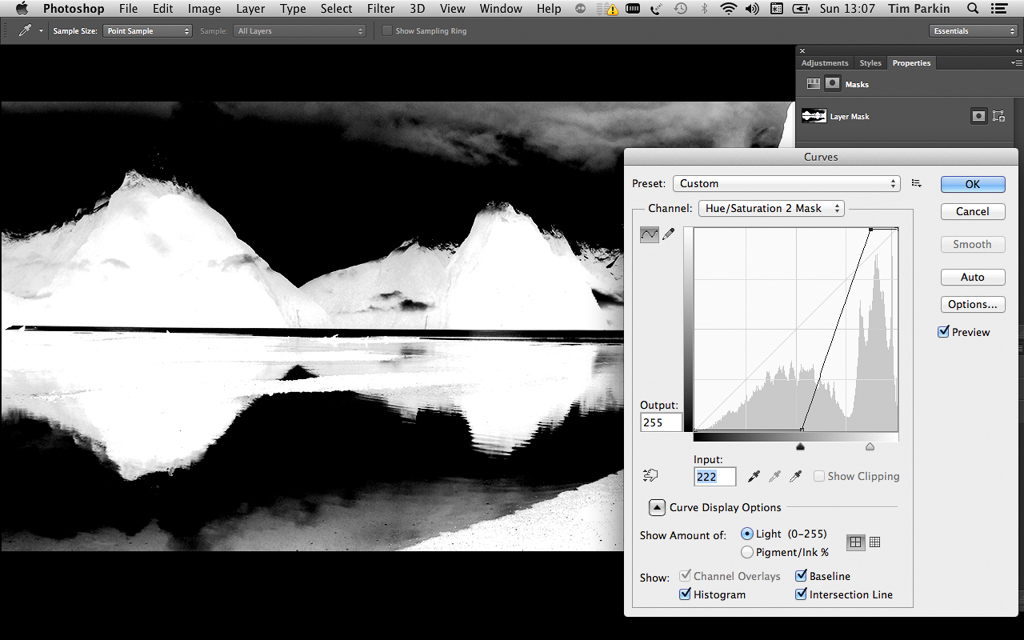
We want to hone in our selection onto just the very darkest parts of the picture. We can do this by using a curves adjustment layer and bringing in the white point and black point as shown below. We could also have used a levels adjustment here.
Now if we "Alt" click on the layer mask again we go back to the view of our picture. We can then click on the adjustment part of the layer (depending on your version of Photoshop) and make a change to our saturation. In our we took 16 poinys off the saturation to make it look "normal" (at least more normal anyway).
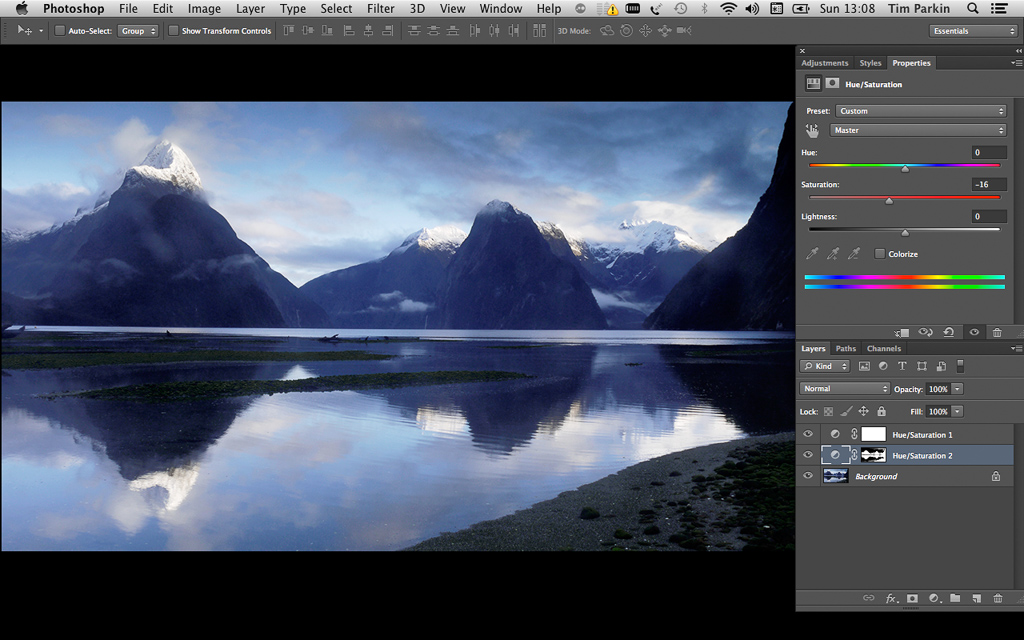
The final image shows increased saturation in the sky and mid-tones but an aesthetically pleasing level of colour in the shadows.
Some Background
Interestingly after talking to a couple of video producers and doing some research online I’ve found that this technique is quite common in video production and also is used by painters in order to create the effect of greater saturation in the picture using the general psychological rule that the eye sees ‘differences’ in vision rather than absolutes (i.e. if you want something to look dark, place something bright next to it, want something to look warm, place something cold next to it).