

Joe Cornish tackles 'Contre Jour'

Tim Parkin
Tim Parkin is a landscape photographer living in Scotland who co-founded On Landscape magazine. Alongside his photography and writing he also co-founded the Natural Landscape Photography Awards, runs a film scanning business and is a judge for other international landscape and nature competitions.

Joe Cornish
Professional landscape photographer.
Introduction from Joe
Shooting into the Sun - Introduction by Joe Cornish
Almost unbelievably now, it isn’t that long ago since camera and film manufacturers encouraged would-be photographers to take pictures with the sun ‘over the shoulder’. Quite simply (and understandably) they knew that there was a better chance of the picture ‘coming out’. What they did not say was that it was also a far less interesting way to use light!
Today, modern cameras make a mockery of the exposure problems facing our photographic forebears. Nevertheless, shooting into the light still brings with it a multitude of problems. Excessive contrast is one, while lens generated and exacerbated flare is another. In this article, Tim describes and provides various methods for mitigating or eliminating most of the major flare types.
Why should we worry? Well, self-evidently flare is a distraction, an unwanted blight on the picture. Flare draws attention to the fact that the image was generated photographically by a lens. So it screams, inelegantly, !π@&*>photograph
As always in any form of expression, there are exceptions. Film-makers have deliberately used flare for decades as a way of evoking a sense of blinding light, and heat… but in many cases that may have been because they had little choice. Light sources in the image area are always prone to creating flare, especially with complex multi element lenses like the zooms that film-makers typically deploy. There may be some circumstances to keep the flare, and let it play a role. But generally, this will be for artists self-consciously referring to the process, to the medium.
Hopefully Tim’s article will inspire you to confidently take the risk of going ‘into the light’. In landscape photography especially, no other lighting is able to potentially create so much emotional resonance.
- Joe Cornish
Shooting Into the Sun...
Whether you are a sunrise/sunset loving photographer or not, on occasion you may need to take a picture shooting directly into the sun. Normally this brings with it a host of problems, whatever type of camera you are using. It is true that some cameras and lenses cope better when pointed directly at the sun (e.g. my usual favourite large format cameras and film but also Leica lenses are very flare resistant) but in general you will see one or more of the following effects.
- flare
- bright patches
- starburst
- veiling
- beams
- clipping
- film going clear
- colour problems (greens?)
- lack of colour
- banding around the sun
- oversaturation around sun
As an aside, older lenses were no 'coated' (single or other) and they used to cause a 'veiling' glare that instead of being a problem, was actually an advantage in shooting black and white film. the small amount of extra light across the whole picture sensitises black and white film, helping get detail in deep shadow; like a 'pre-flash' that is used in black and white printing. Anyway - back to the programme... :-)
In this article we’ll try to address all of these issues and at the end I hope you’ll be more confident in getting pleasing pictures that include the sun in the frame
Flare
Typical Flare
When people normally think of flare, they think of those hexagonal light spots that make it look as if the sun is about to go into some science fiction warp drive. Flare can hide itself in a simple lack of contrast though, which may not be noticeable when you are taking the shot.
To give you an idea of what sort of thing we’re looking for, here is a picture I took when I first started photography.

Now I’m sure you can see a few different flare spots here but for every one you can see, there are a few that are more difficult to pick up.
Boosting the saturation or vibrance will help you find objectionable examples of flare spots. In this case I boosted the saturation in L*ab mode to separate out red and green as usually flare is most obvious over grass or plants (probably because orange/red is it’s complementary colour).
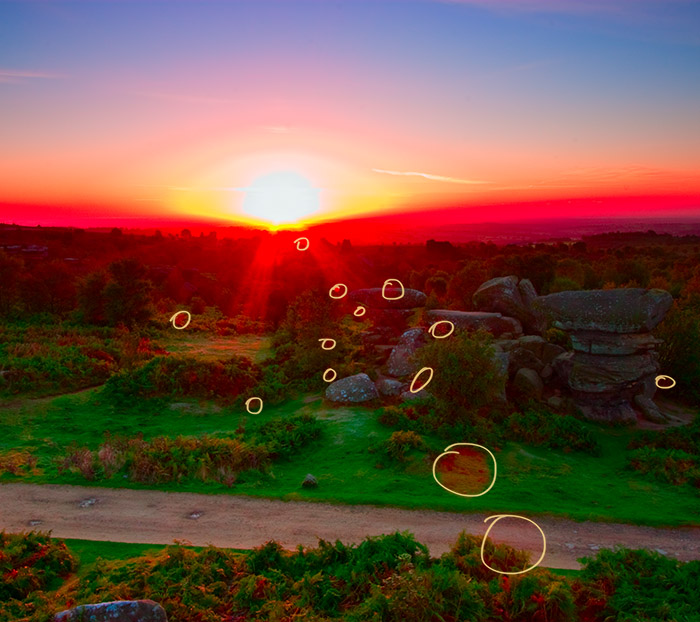
This shows up a few more, for instance there is a flare spot over the road that wasn’t easily visible in the first picture. This should help you find flare artefacts before you send your image off to print. In the next picture I’ve highlighted the main culprits.
In the following diagram you can use the slider to drag the bar left and right, revealing the original file and the saturated version with my marks showing the main flare spots.
Veiling Flare and Techniques to Remove both
Veiling flare is a more insidious and less easily detectale beast. It's only real effect is to reduce the contrast of the scene by overlaying a uniform fog over either a major part of the picture or over all of it.
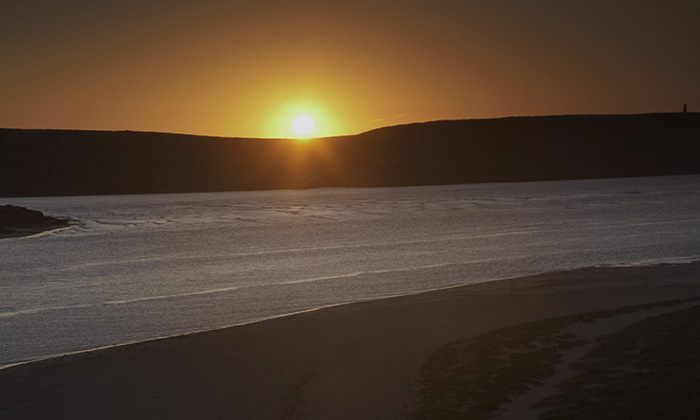
When the flare is uniform, it can be removable, at the cost of dynamic range and shadow detail. When the flare is non-uniform, it can make it very difficult to get a consistent black/dark point across the whole of your image. The following example shows a shot that I had taken in Scotland a couple of years ago and which shows how the background of the scene, which should be neutral and quite dark, has been raised to a near uniform bluey grey.
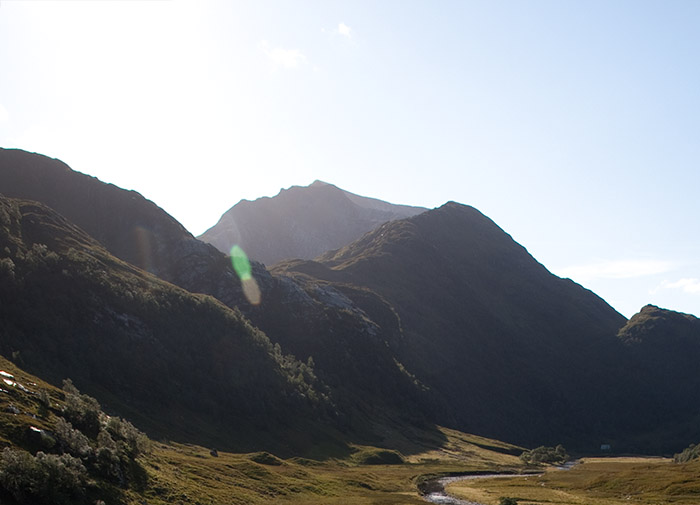
This flare is caused by a variety of sources but is primarily a result of light bouncing around the camera/lens internals or from the surfaces or filters and lens elements. A camera/lens combination that has good control of veiling flare will show deep blacks even when there is a bright area in or near the image. Obviously, you can see that this image also shows some .extreme spot flare, clearly showing the shape of the aperture. The next step is showing a simple solution to reduce the effects of flare
Give Flare the Finger!
Most people know that you should try to keep the sun out of the frame in order to reduce the effects of flare. Most people also know that you can put something in front of the sun in order to minimise flare. So a quick trick that we can do is to stick something in front of the sun! But obviously, the whole point of having the sun in the frame is to show it off.
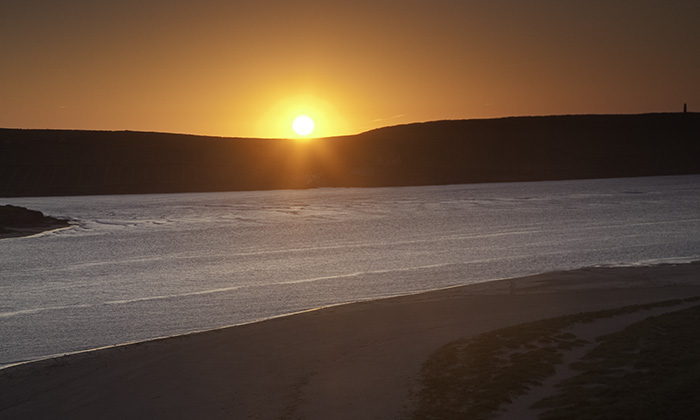
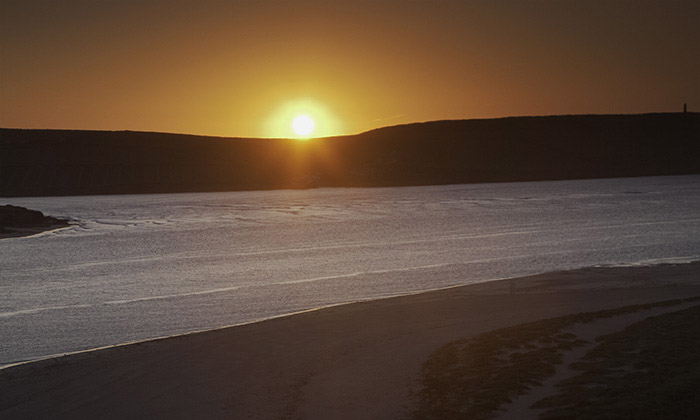
The trick is to take a picture as normal and then take a picture with something in front of the sun, a finger or a stick or something. The picture below shows a comparison of our previous picture which includes lens flare and veiling flare and the same shot (almost) with my finger in front
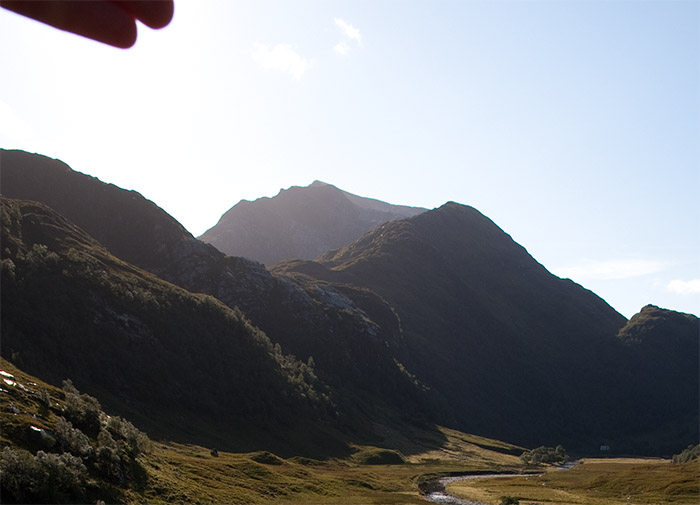
Once you've got these two pictures, you can combine them into two layers and use a layer mask to allow you to brush out the negative effects of the flare.
Clipping and Colour Issues
Shooting into the sun can also raise all sorts of issues to do with the way digital systems handle colour. This also includes any film that has been processed by a computer, ie. scanned film.
The main issue is caused when channels clip and is particularly bad when channels clip at different points. The combination of this uneven channel clipping and also the way that some raw converters try to preserve highlight detail can cause colour shifts towards green where we should have yellows. When you combine these changes with the use of colour profiles with small 'gamuts', we can have a situation where we have visible banding in what should be smooth gradients and greenish tinges to the edge of the suns disc (some of the tinges toward green can be caused when pure saturated yellows are reduced in brightness, try it for yourself, watch a loveley pure yellow go khaki green as you reduce the brightness).
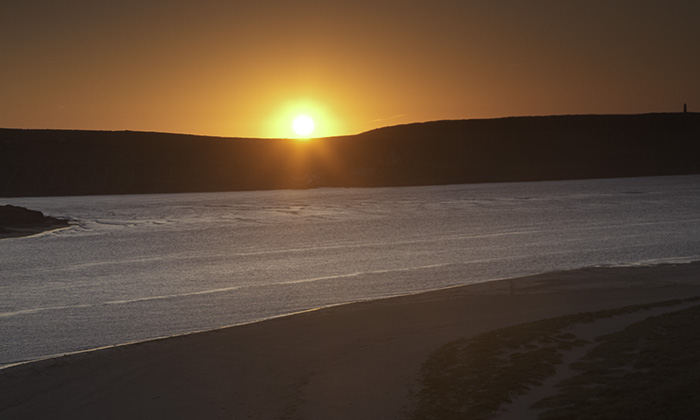
Banding in Sunset Skies (or the Fried Egg effect)
We'll take a look at the banding effect to begin with, one of the more objectionable issues that tends to plague digital sunsets, but can also affect film scans. The image below was taken in Rock, Cornwall a couple of years ago and shows a serious amount of banding around the sun. This picture was processed in adobe lightroom using the standard settings.

When I started trying to find the cause of this, I searched around the internet and witnessed many vociferous arguments between people who insisted that channels must be clipping but with other people saying that they had well-exposed pictures. It turns out that this isn't clipping, at least not the type that most people think about.
The main evidence for this was that the area of banding moved around when I used the exposure slider to increase and decrease exposure levels. The interesting thing was that the banding was greatly reduced when the exposure was reduced. As I've been reading a lot about colour profiles recently, I started to wonder whether the colours in the picture were exceeding the bounds of either the monitor profile (ie. the colours that the monitor could show) or the photo profile gamut (ie. the colours that the image data values can represent). Reducing the exposure would 'pull' the values to within the bounds of the colour profile's gamut.
To state things simply, data values in the picture that exceed the values that the screen or image profile can represent get 'munged' to other values. This will inevitably cause a nice smooth gradient to go wrong at the point where values start to get munged.
The picture below shows how reducing the exposure level (using photoshops exposure slider) reduced the visibility of the banding.

before="Fried Egg" after="Fixed"
However the banding is still visible and you have to reduce the exposure to a ridiculous level to get things back in gamut. Having just bought Phase One's Capture One, and heard some talk that it handled the 'clipping' in sunset's more realistically. I thought I would give it a go, even though I knew it wasn't a 'clipping' thing. The picture below shows the raw output of Capture One, which surprised me in being significantly better than the adobe version
before="Fried Egg Capture One" after="Fixed Capture One"
So in summary, you can improve on your adobe raw converter results in a variety of ways. If we include the final fix to the colours as described in this next section, we get the following improvement. I've also done some tweaks to the curves in the sky in order to 'spread' some of the transitions a little.
before="Fried Egg " after="Fixed Capture One Tweak"
As you can see, Capture one is doing a great job and with the exposure tweak, we're heading towards a very smooth result. However, we have one last issue to play with and it rears it's head when yellows are reduced in lightness (like when we pull down the exposure or when software starts to do 'highlight recovery'.
As an aside, some people have expressed confusion as to what a raw converter actually does and why one raw converter can be better than another. I'll be covering this in another article but to summarise, digital cameras don't record RGB values at every pixel and so raw converters have to work out what the missing colour values are. For the colour blue, for instance, the software has to interpolate the full data from only 25% of blue pixels, making up three times as much data as was there originally. Raw converters work out whether the missing data is part of a texture, or a smooth gradient, or a line, etc. Different assumptions are made and some raw converters are better for portraits (where they presume smooth textures) and others for architecture (where they presume lines). A perfect Raw converter is impossible
Raw converters also have to work out what an RGB value of 1024,500,120 actually is when converted to a real colour and so they have to test various cameras or rely on what the camera vendor says it is. Then they make loads of compromise decisions like "How keen should I be to create a colour that is outside of a typical printer gamut?" for instance)
Fixing the Yellows
So the final step is getting a good result for our sunset is to fix any odd colours that have appeared, for instance, the slight green cast in our final example
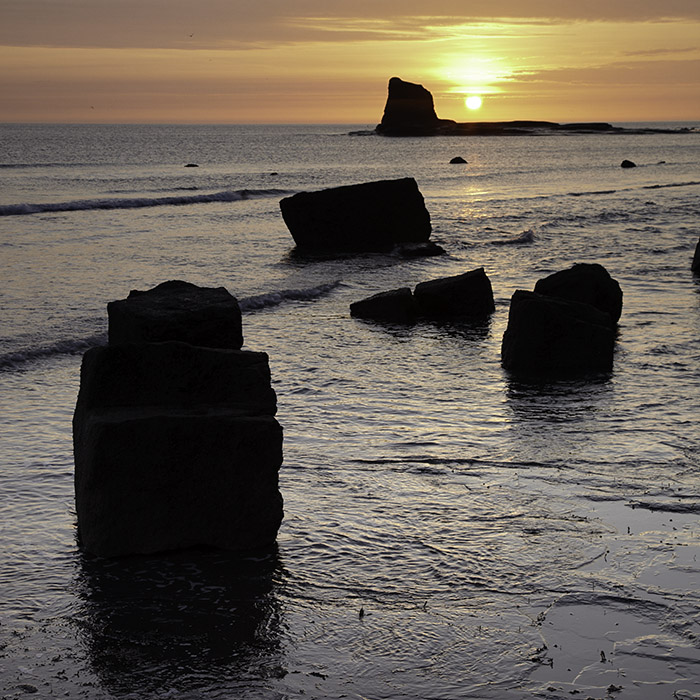
We'll use a different example here, this is taken at Saltwick Bay recently and shows how the yellows near the sun end up clipping so much they're saturating quite unnaturally and on some monitors, they may be showing a slight green to the yellows. Our job is to try to create a smoother tonal transition and to keep the colours from looking unnatural, and hopefully trying to keep the colours inside the 'gamut' of possible printable/displayable colours.
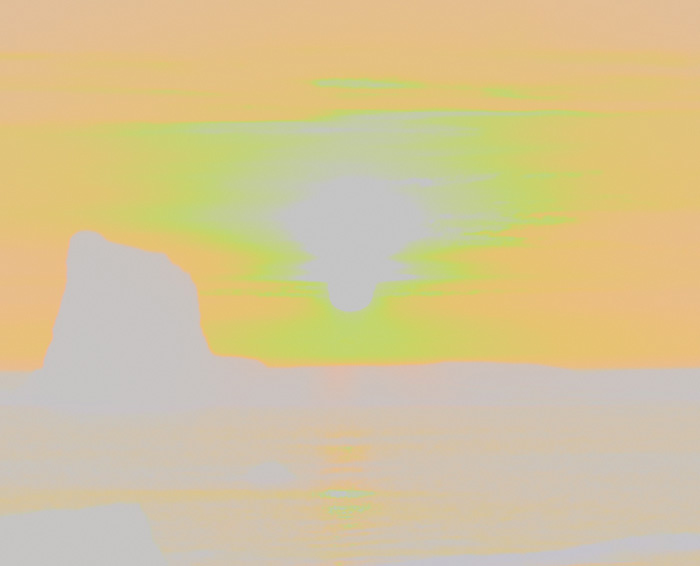
An approach I like to use is to duplicate the image layer, convert it's blend mode to 'color' and then create a grey layer beneath it. This will show up any strange colour gradients. In this case we can see that the area around the sun is a little too green (just remember it's when saturated yellows get darker that we get a green tinge).
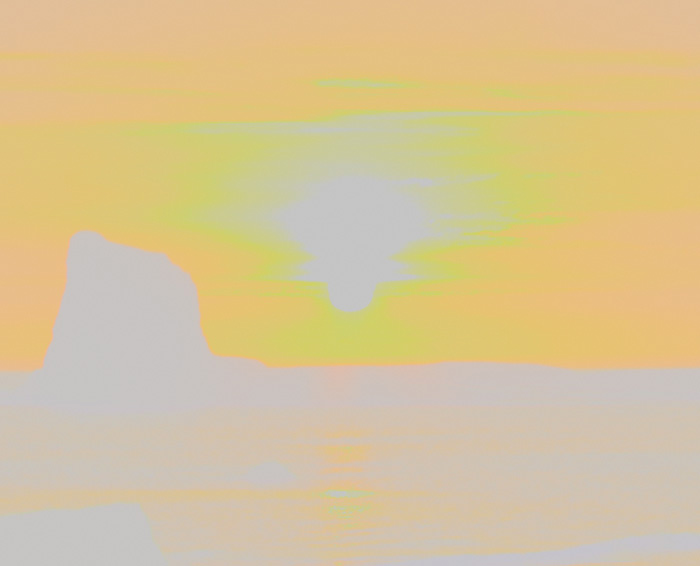
before="no green fix " after="green fix"
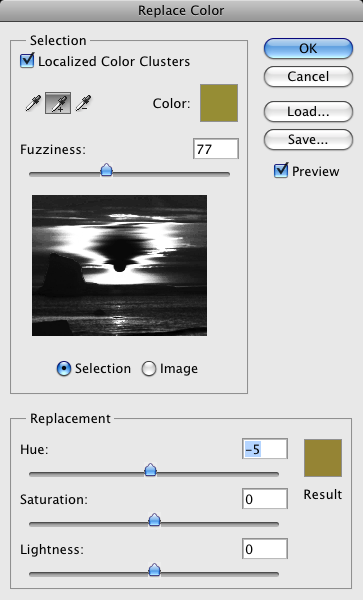
What I've done on this 'colour' layer is to use 'replace colour' and select a bunch of the greeny yellows and hue shifted them down about 5-7 degrees. When I now remove the grey layer and allow the colour layer to overlay my original image, I get a more natural-looking sunset. Here are the colour settings I used and a comparison of the before and after results on our image.

before="Fried Egg " after="Fixed Capture One Tweak"
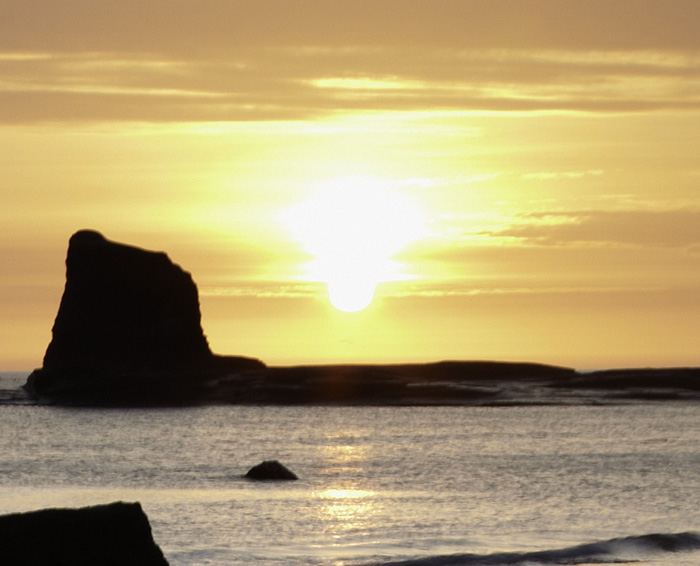
And here is another frame from that morning showing how I've fixed the unnatural yellows around the sun

Using Highlight Recovery and Over Saturation
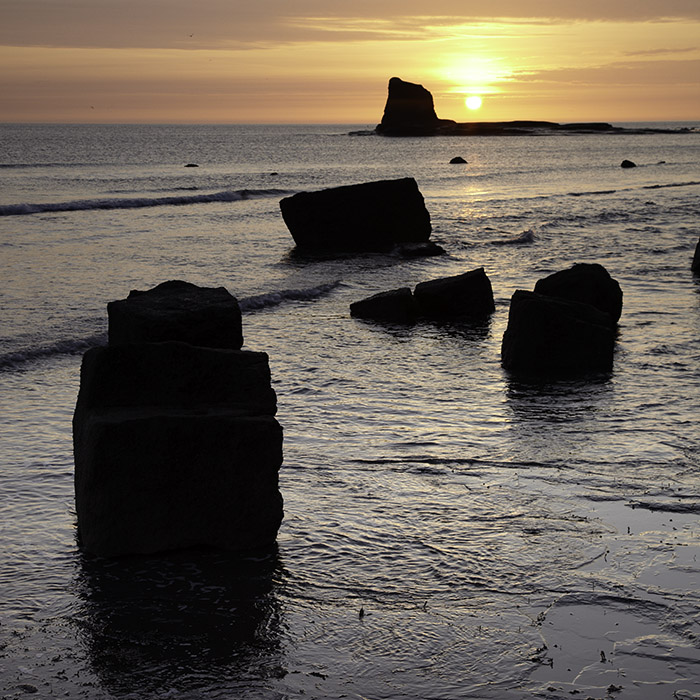
My last example shows how the highlight recovery command can cause over saturation if used in areas around the sun. The example below shows a before and after picture where I have applied some highlight recovery photoshop's 'shadow/highlight' tool. You should be able to see the area that has increased in saturation.
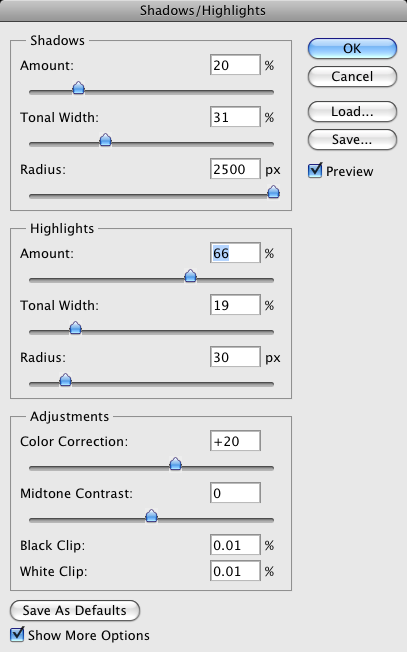
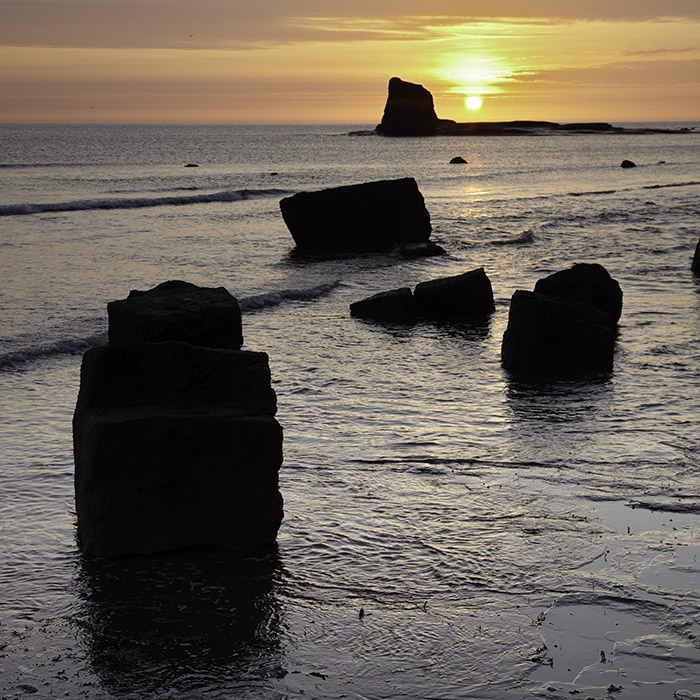
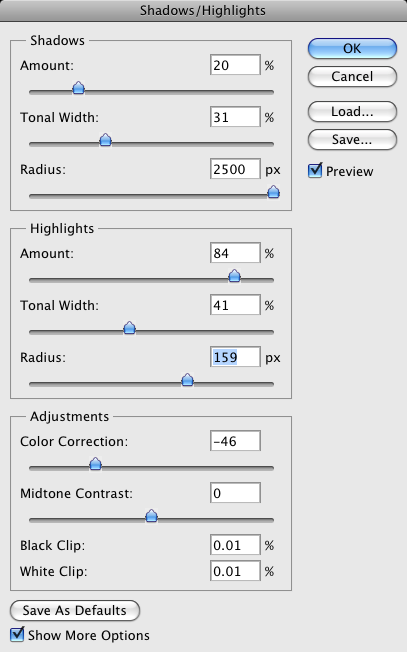
And here we've used the 'colour correction' slider on the shadow highlight tool. As an aside, it is nearly always a good idea to have a quick check of the colour correction tool; in most cases, a strong shadow recovery will need a positive colour correction and a strong highlight recovery will need a negative colour correction.

Conclusion
I hope this article has given you a few ideas of how you can improve your shots taken directly into the sun. If you have any question, please don't forget to send them to questions@landscapegb.com and I'll do my best to try to answer them, or if not, find someone who can.