
Techniques for merging multiple exposures

Tim Parkin
Tim Parkin is a landscape photographer living in Scotland who co-founded On Landscape magazine. Alongside his photography and writing he also co-founded the Natural Landscape Photography Awards, runs a film scanning business and is a judge for other international landscape and nature competitions.
One of our accepted goals as photographers is to ensure that our final ‘product’ is correctly exposed (we’ll come back to what ‘correctly exposed’ actually means later).
Digital cameras can supposedly record 13 stops of dynamic range but real world tests show that although it’s possibly to detect differences at the 10th, 11th and 12th stops, they are swamped by noise. The real dynamic range of a good DSLR is about 8 or 9 stops. To put the that 8 stops into perspective, just picture the histogram on the back of your camera. The 8th and 9th stops are represented by the last single pixel width line on the left hand side of the histogram. In order to get good quality images, it is best to get the exposure within 8 stops. This is still better than slide film which manages about 6 stops although a way to go before it gets to print films nearly 10+ stops of usable dynamic range.
So it makes sense for us to limit our dynamic range so that nothing in the scene exceeds these values. Many photographers use graduated neutral density filters to hold back parts of a scene but there are still situations where our chosen composition, for instance shooting a valley or out of a cave or at the coast where the rocks can impinge on a grad (think Porth Nanven).
In these situations, there are only really a couple of solutions. One is to use print film (a solution that Andrew Nadolski used in his book “End of the Land” where he used no graduated filters), barring this though, we need to take multiple exposures and blend them together somehow .
That somehow is the subject of this article. In summary there are loads of somehows and there are various vociferous arguments about which techniques are best and we’ll try to cut through some of these to recommend what works in terms of the end photographic product. Our goal will be to create believable results and so we won’t be covering the more extreme ‘tone mapping’ techniques (although I won’t be saying that most extreme HDR is crap - it’s just more of a ‘special effect’ that makes me queasy but some love0.
The first thing to mention is that there a bit of a dichotomy between capturing large dynamic ranges in photographs and creating the sorts of bold saturated landscapes that have become de-rigeur in the landscape photography community. There have been quite a few studies that have reported on our ‘acceptance’ of different saturation levels and they have discovered that we can ‘believe’ high saturation pictures if the scene itself is also high contrast. We have difficulty accepting strong saturation if the scene is itself very low contrast.
This means that in order to make a believable image of a scene that encompasses a large dynamic range, we should be limiting the saturation. And conversely, if we want high saturation, we should be trying to capture scenes with limited dynamic range.
I think that this is where the inherent success of slide film comes in. Because it inherently can only record a low dynamic range image, it’s high saturation remains fairly believable - to an extent ;-)
What this implies is that some of the tricks that slide photographers use to make picture fit in the range of their film are still useful for digital photographers. For example, most slide photographers will not shoot in direct sunlight and if shooting straight into the sun, will wait until the sun goes behind a cloud (even if it’s only a very thin cloud) which will knock a couple of stops of brightness off the area around the sun and probably knock a stop of brightness of the highlights in the landscape.
However, back in the land of exposure blending :-)
There are two primary ways of combining multiple images together. The first is to use a HDR program of some sort, which will produce a true HDR image (pre tone-mapping) and the second is to blend the images together in some fashion.
HDR
The first step of HDR is to combine multiple pictures together to give a final version which has all of that information. The resulting file is as flat as a pancake and unless your tastes are for extreme low contrast, you won’t like it. The clever bit of HDR is how to increase the contrast in this picture without blowing out different areas. The typical answer is some form of ‘tone mapping’. A really simple way of thinking about tonemapping is as an ‘adaptive’ neutral density filter that conforms to the bright bits of your picture, allowing you to turn up the brightness without blowing highlights. The different in most HDR software is how it handles the ‘adaptive’ bit (there are lots of extra things that HDR software can do such as large radius sharpening to increase ‘texture’ but these are really not part of the HDR process we are looking at).
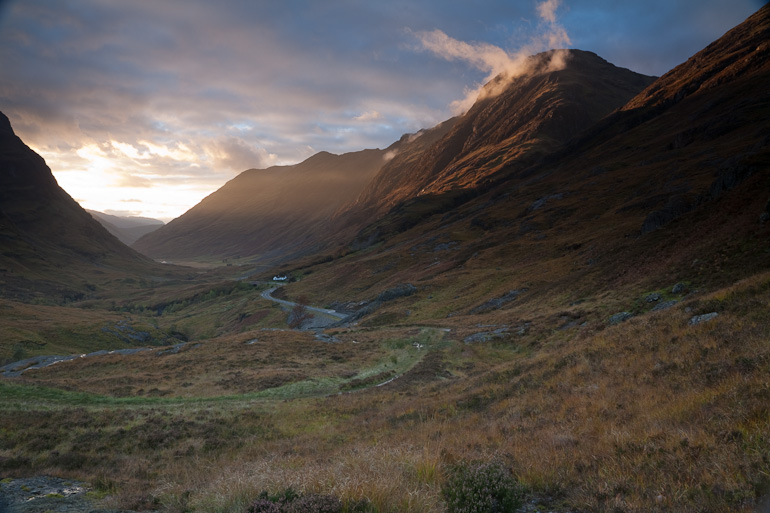
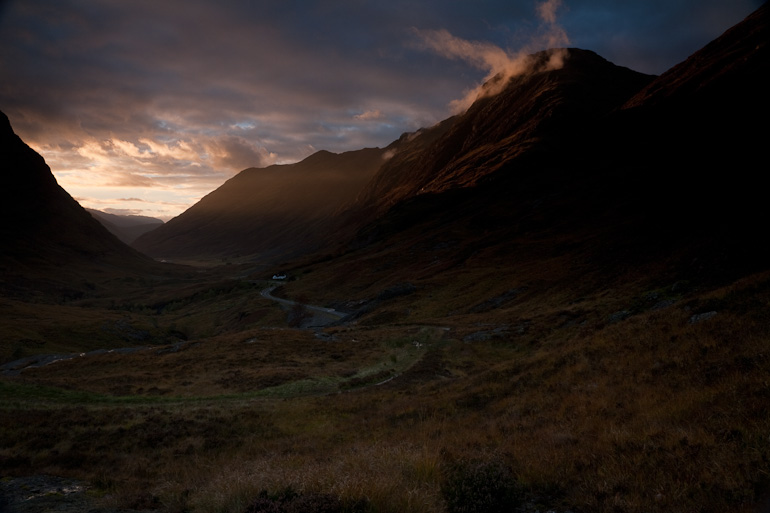
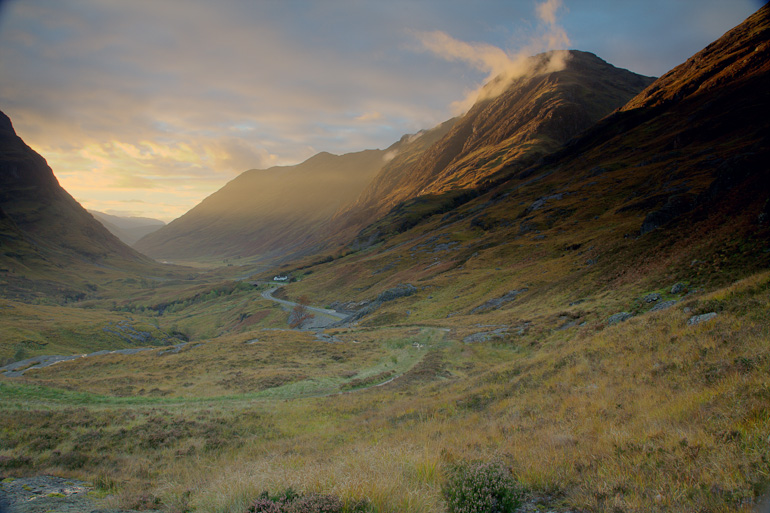
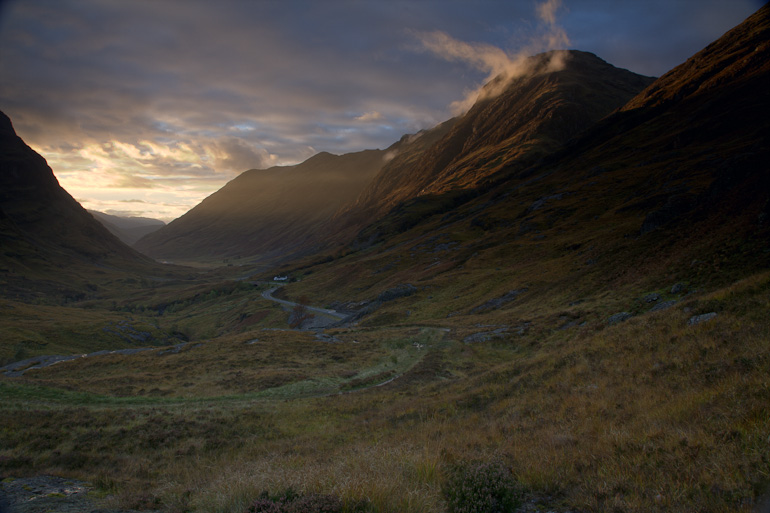
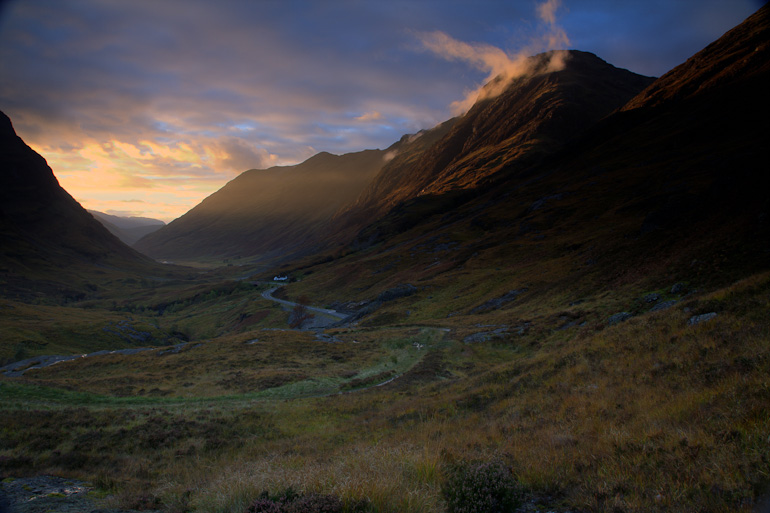
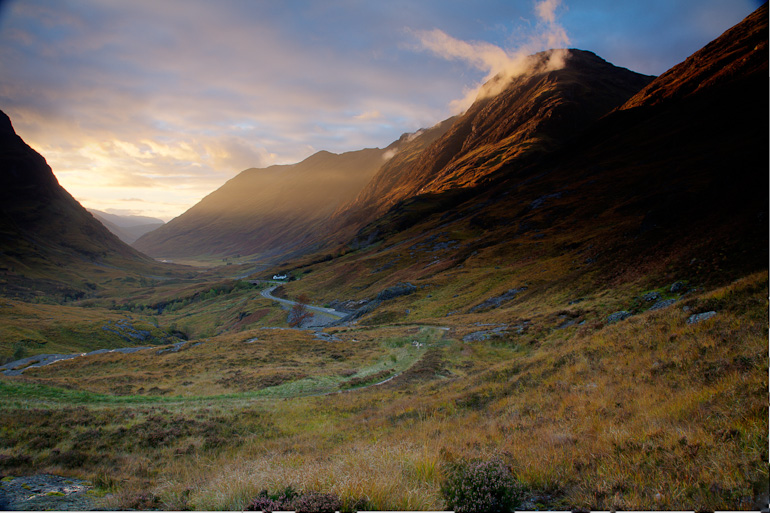
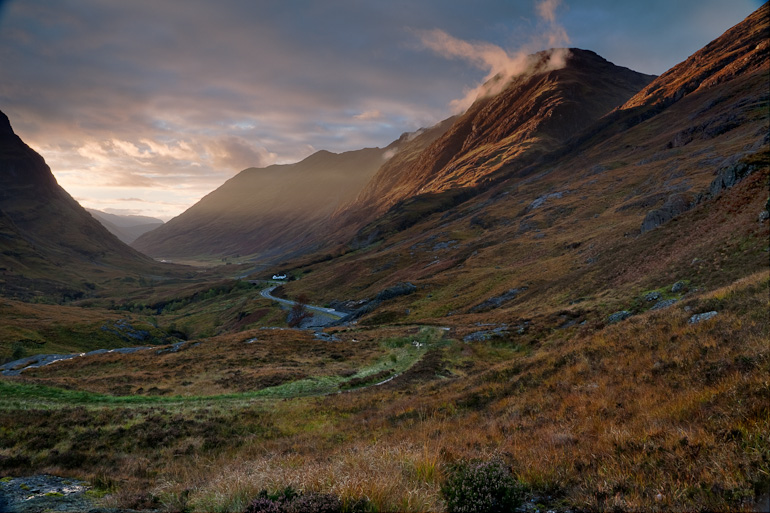
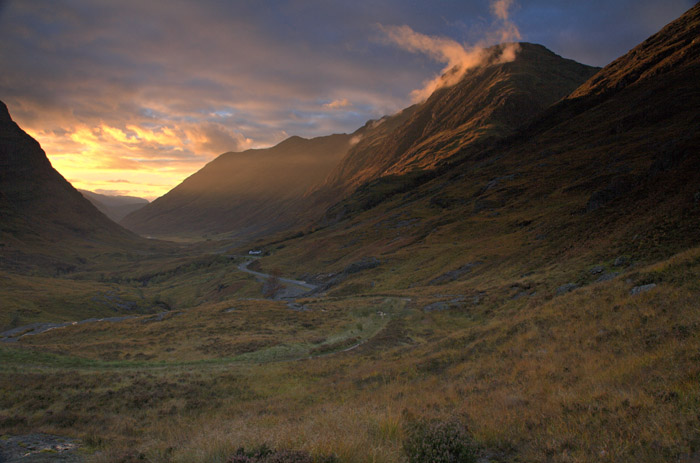
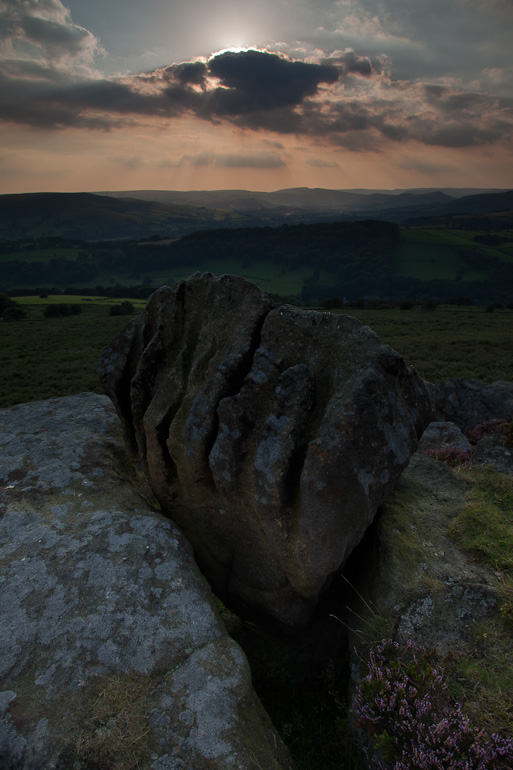
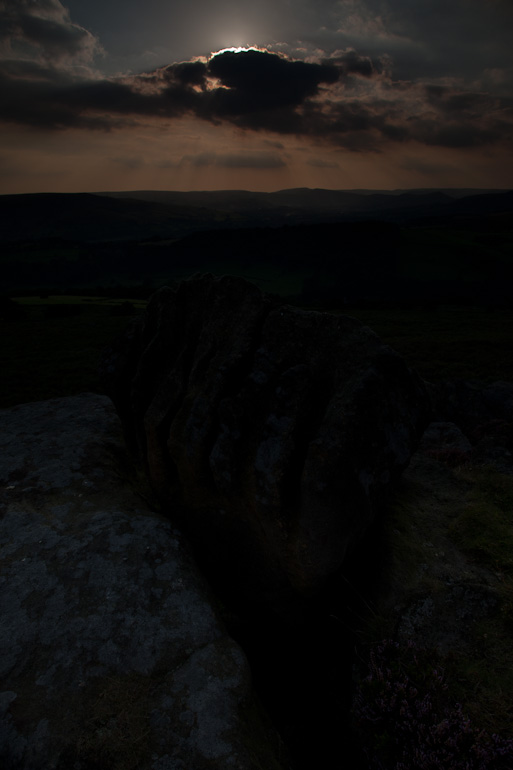
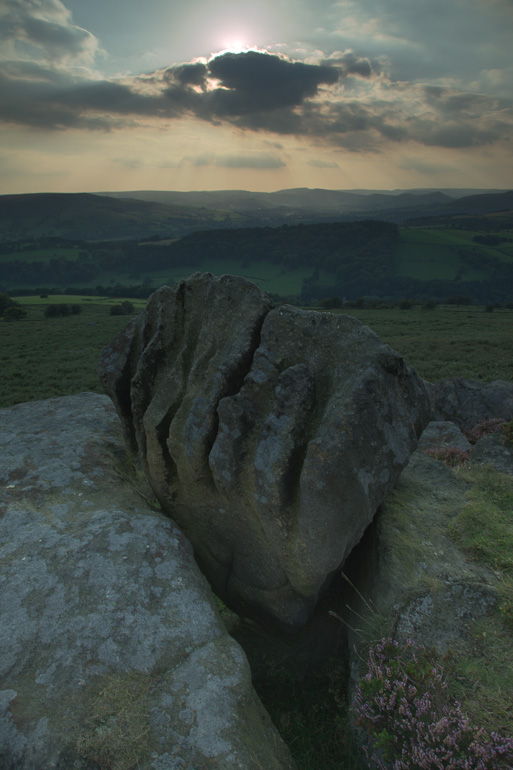
At it’s most simple, the tone mapping can just simulate a graduated neutral density filter that has a bend in it (i.e. that isn’t a straight line graduation). Most HDR goes a bit further than this to look for things like specular highlights and limit their brightness. I’ll include a few exampls below by processing a photo I took in Glencoe some time ago and also an image taken near Carr Head in the Peak District.
Here are the original images
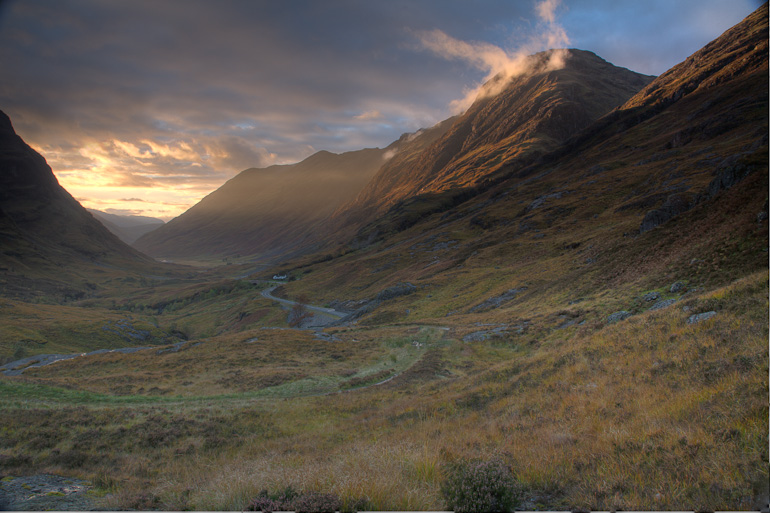
Here's what the image looks like when combined into a HDR file and then just exported with the full dynamic range.

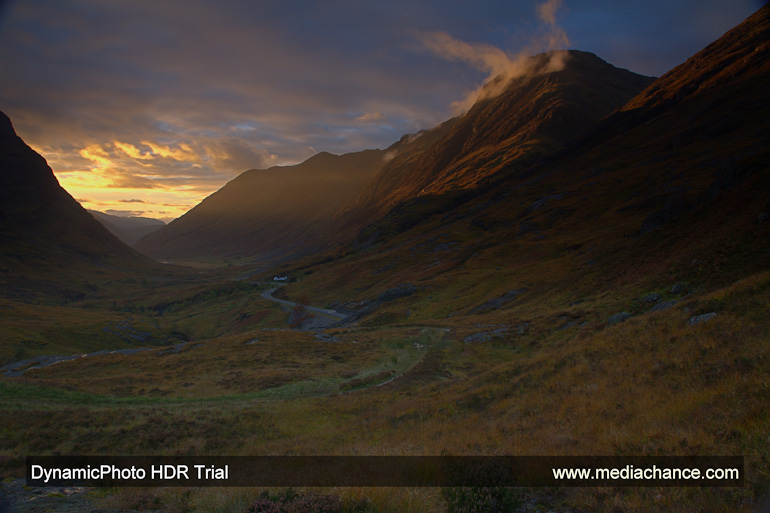
That's pretty dull. However it's got all of the information in it, just not particularly nice. Most of the work in HDR software is in mapping this file into a higher contrast image without generating obvious signs. We ran a few different HDR software programs and got the following results. The captions show what the file is but in summary, the first is a hand blend (as per video), photomatix, picturenaut and finally Dynamic Photo HDR. I'll add a couple more when I get time (HDR EFX and Fhotoroom).
-

- Dynamic Photo HDR
-

- Picturenaut (photoreceptor)
-

- Picturenaut (bilateral)
-

- Picturenaut (adaptive)
-

- Photomatix (fusion)

-

- Photomatix (enhancer)
-

- Photomatix (compressor)
-

- Hand Blended (see video)
-

- Artizen (default)

-

- Artizen (subtle)
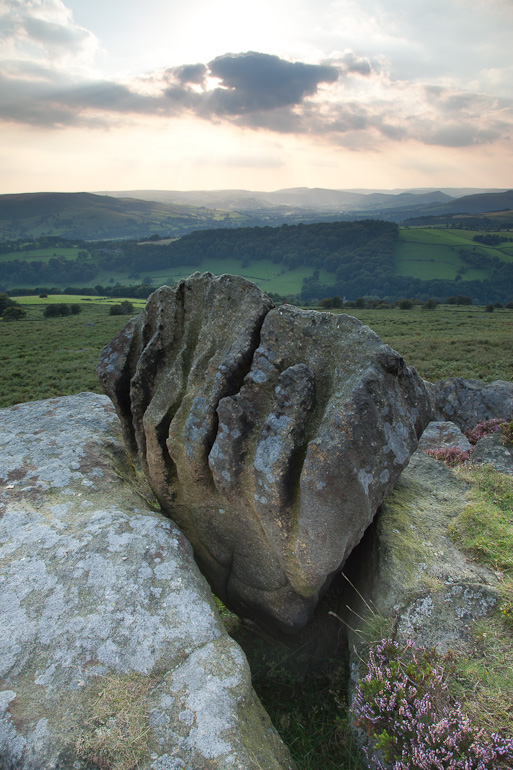
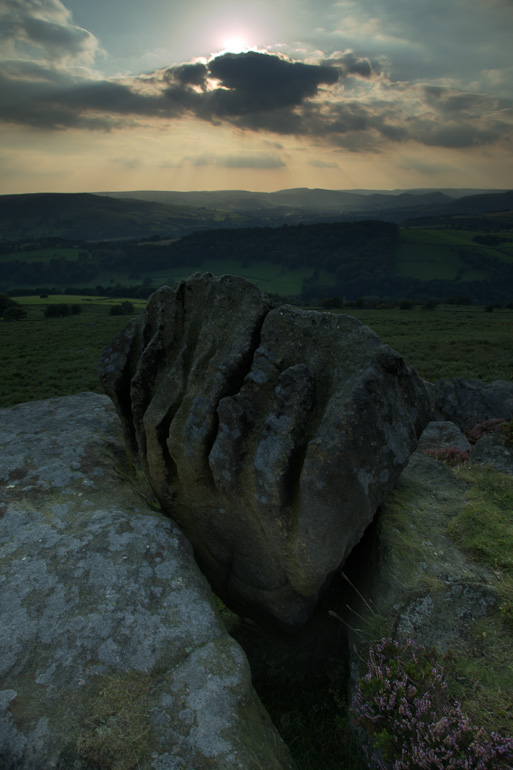
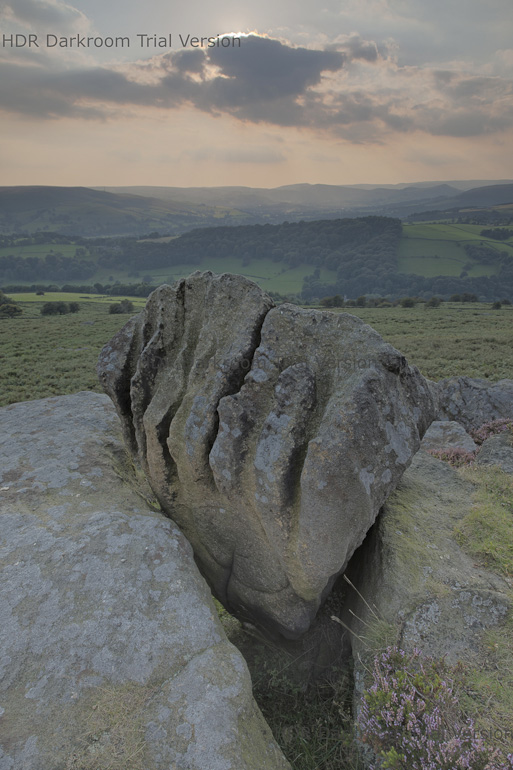
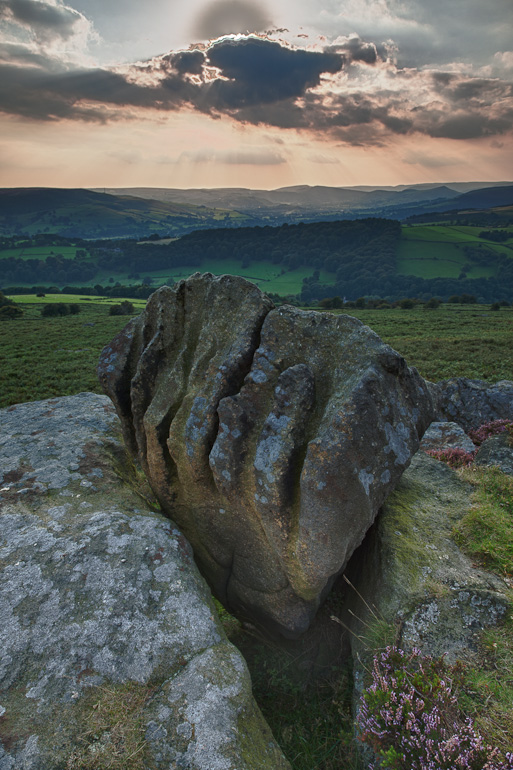
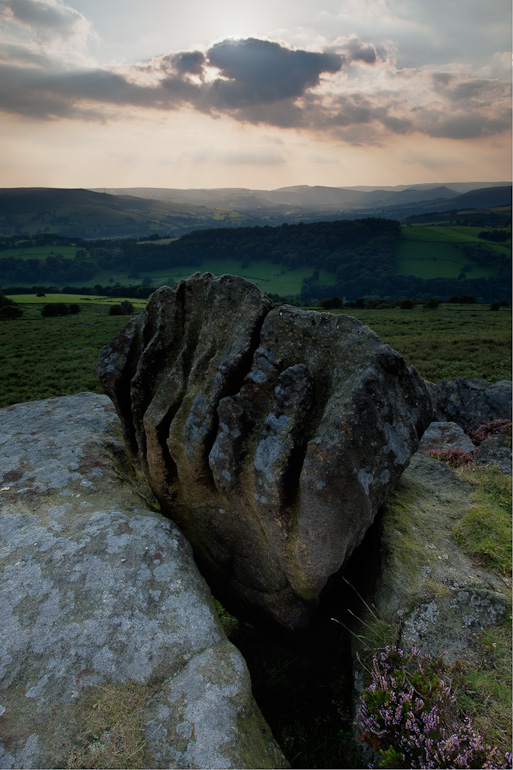
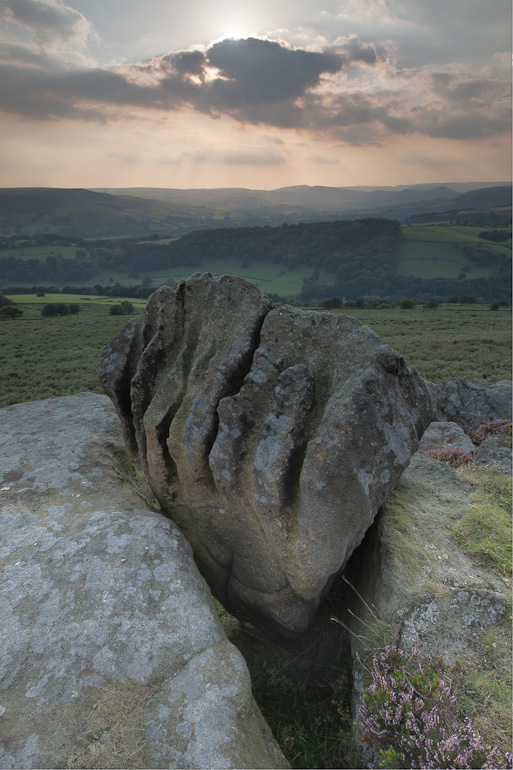
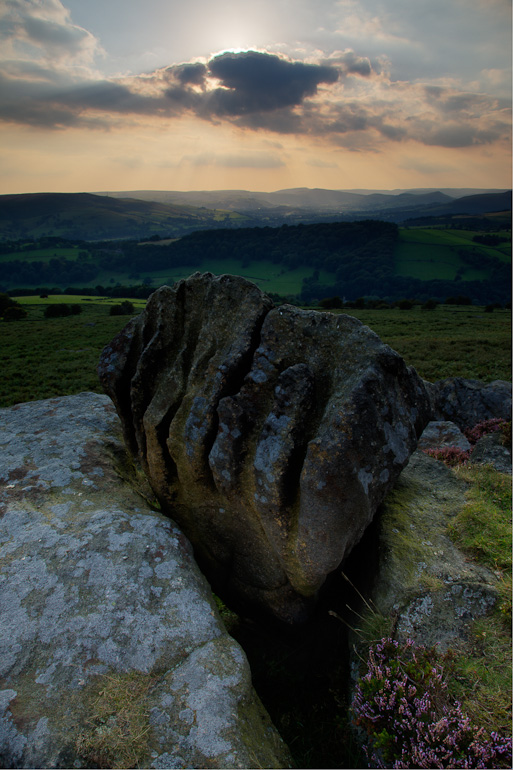
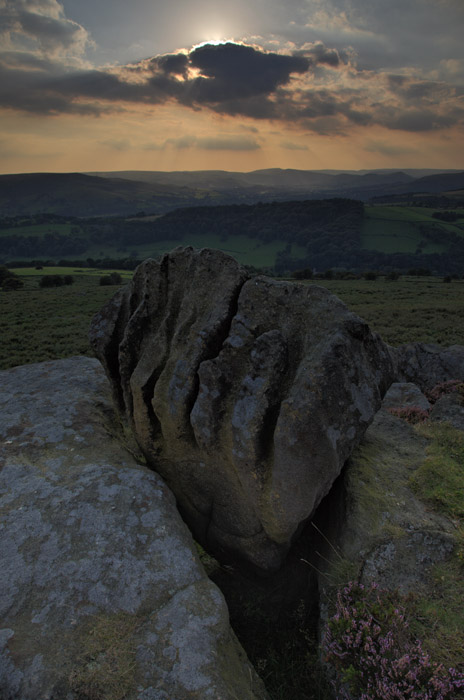
We also tried a Peak District photograph. Here are the original images
And here is the flat HDR of the peak district shot

Photoshop flat HDR
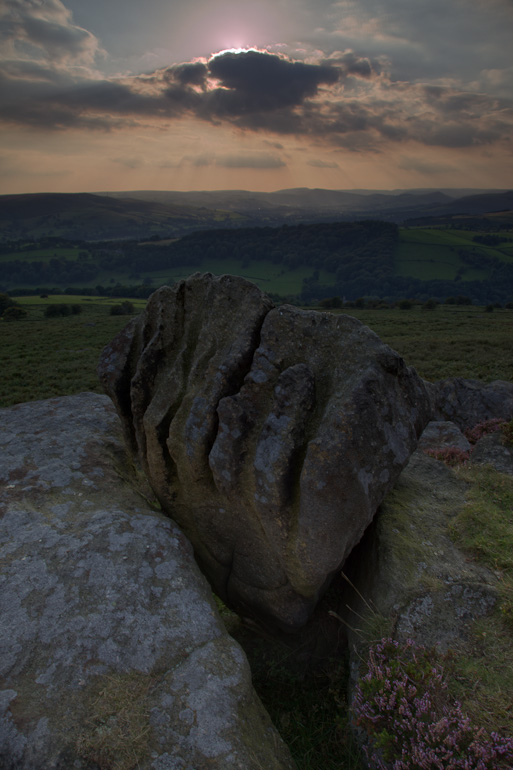
And here are my conversions of the peak district shot. This includes a couple of more HDR software programs.
-

- Picturenaut (tonemapped)

-

- Picturenaut (exposure mode)
-

- Picturenaut (bilateral)
-

- Picturenaut (flat)
-

- HDR Darkroom
-

- HDR EFX
-

- Photomatix (tonecompressor)
-

- Photomatix (enhancer)
-

- Photomatix (default)
-

- Artizen (default)
The worst was HDR Efx which ended up displaying all sorts of artifacts e.g.

The following video shows hand blends of both the Glencoe shot and the Peak District shots.
My conclusion from all of this? Well, Photomatix (using the fusion settings) and Fhotoroom Artizen seem to be the best from what I've seen although a hand blend works better than both as far as I am concerned.
Whenever there are extreme contrast edges or movement, having manual control certainly pays off. I shall be looking at the use of these two pieces of software in the next edition and seeing how they handle more complicated situations.
At the end of the day though, it seems the key for me is to try not to blend too many pictures (the fewer transitions the better in real world conditions, regardless of what the HDR people say). Three exposures maximum and if you can get away with a main exposure and then an extra exposure for highlights things work out a lot better. However, I am but a beginner.
If anybody has a good set of exposures for me to try out, let me know and I'll pick the most challenging for the next edition. Hope you liked this, if you have any questions or suggestions, please let me know in the comments.