
Part I

Max Rush
Max A Rush is a professional landscape photographer specialising in London’s parks and gardens. With a background in art, music and natural history, he first became interested in photography while working as a naturalist for the national parks service in Quebec. He continued his studies in the UK with a series on the mid Wales landscape and then, on moving to London began photographing his local park.
My wife used to play a guessing game about cocktails – someone names a cocktail and you have to name the ingredients. I think she married me because I was the only one who’d heard of Angostura Bitters. Here’s a variation on that game: name the cocktail from the ingredients:
- One offcut of floorboard (oak)
- One plastic chopping board – sourced from Lidl clearance bin
One black fake leather mini skirt - Most of the brass section of a steam locomotive builders’ catalogue, coarsely chopped
- Stainless steel, sliced
- Generous handful of tiny screws
And the answer? A 150MP digital view camera of course.
Conception
Scrutinising an outcrop of Mamiya telephoto lenses in the recesses of one of London’s messiest camera shops, a salesman and I discussed vignetting of the 150mm f/2.8 on a Mirex tilt/shift adapter attached to a Sony A7RII, a conversational possibility of astonishing rarity. For a few years, this hybrid camera has been my primary tool, whose performance has been a constant source of wonder and pride. Not content with the camera’s basic resolution or with the 35mm aspect ratio (a former 6x6 and 5x4 user) I’ve exclusively used the rear shift function to stitch frames, and a separate shift adapter for front rise and fall. What formerly seemed like the clever bit was that to get around the otherwise considerable problem of not being able to view the entire field of view, I built a separate optical viewfinder (lens elements in plastic plumbing fittings) with sliding masks showing the different possible aspect ratios of each lens (3 portrait frames for landscape 5x4 shape and 3 landscape frames for 6x12 panorama) and also to some extent simulating the effect of shift.
“Maybe the vignetting comes from the adapter?” suggested the surprisingly young salesman, twirling a 250mm C like a huge cigar as he reflected. “You should try free-lensing – it’s what lots of people do now”. I bought a small camera bag and left, dashing his hopes of a real sale but leaving me feeling like I’d once again navigated the treacherous “middle of Lidl” without buying anything.
Subsequent research revealed an almost non-existent free-lensing community – perhaps they call it something different, or perhaps it’s not a fad after all. I began thinking about liberating my lenses from their unnaturally cramped environment though – perhaps I could rig something up.
Autumn

Partially recovered from a bout of wondering if anyone really cared about my photographs, I was enjoying going out again in the brief liberty of late 2020. By way of defiance, I’d resolved to do nothing other than make images for myself, which specifically means trees in fog. I did a little more research and found an online gallery of homemade technical cameras, featuring odd lenses mounted on plywood or cannibalised Fuji 680s and an incongruous digital camera clinging to the back. I also looked at Sony adapters for 5x4 cameras. Perhaps I could re-use my Shen Hao folding field camera and just use large format lenses. This seemed a promising idea, although I didn’t like the need to drastically re-focus, given that the camera would be a long way back from the ground glass.
Also, the widest lenses would have to sit even closer to the rear standard than they would for a film back, ruling out anything that was in fact at all wide. A tabletop test of my Schneider 90mm Super Angulon on the Sony looked good though, with signs that it could perform very well if I could get it anywhere near close enough. Always on the lookout for engineering challenges, I thought about whether I could cobble together something new that would do the job. I quite liked the idea of a custom-made solution, and also of something that didn’t look quite as much like an ordinary dull DSLR from a distance. I was bored of being ignored since I stopped using my 5x4 camera in the field and found the tiny controls on the adapter and minuscule camera to be less than inspiring tools for making big photographs.
Christmas
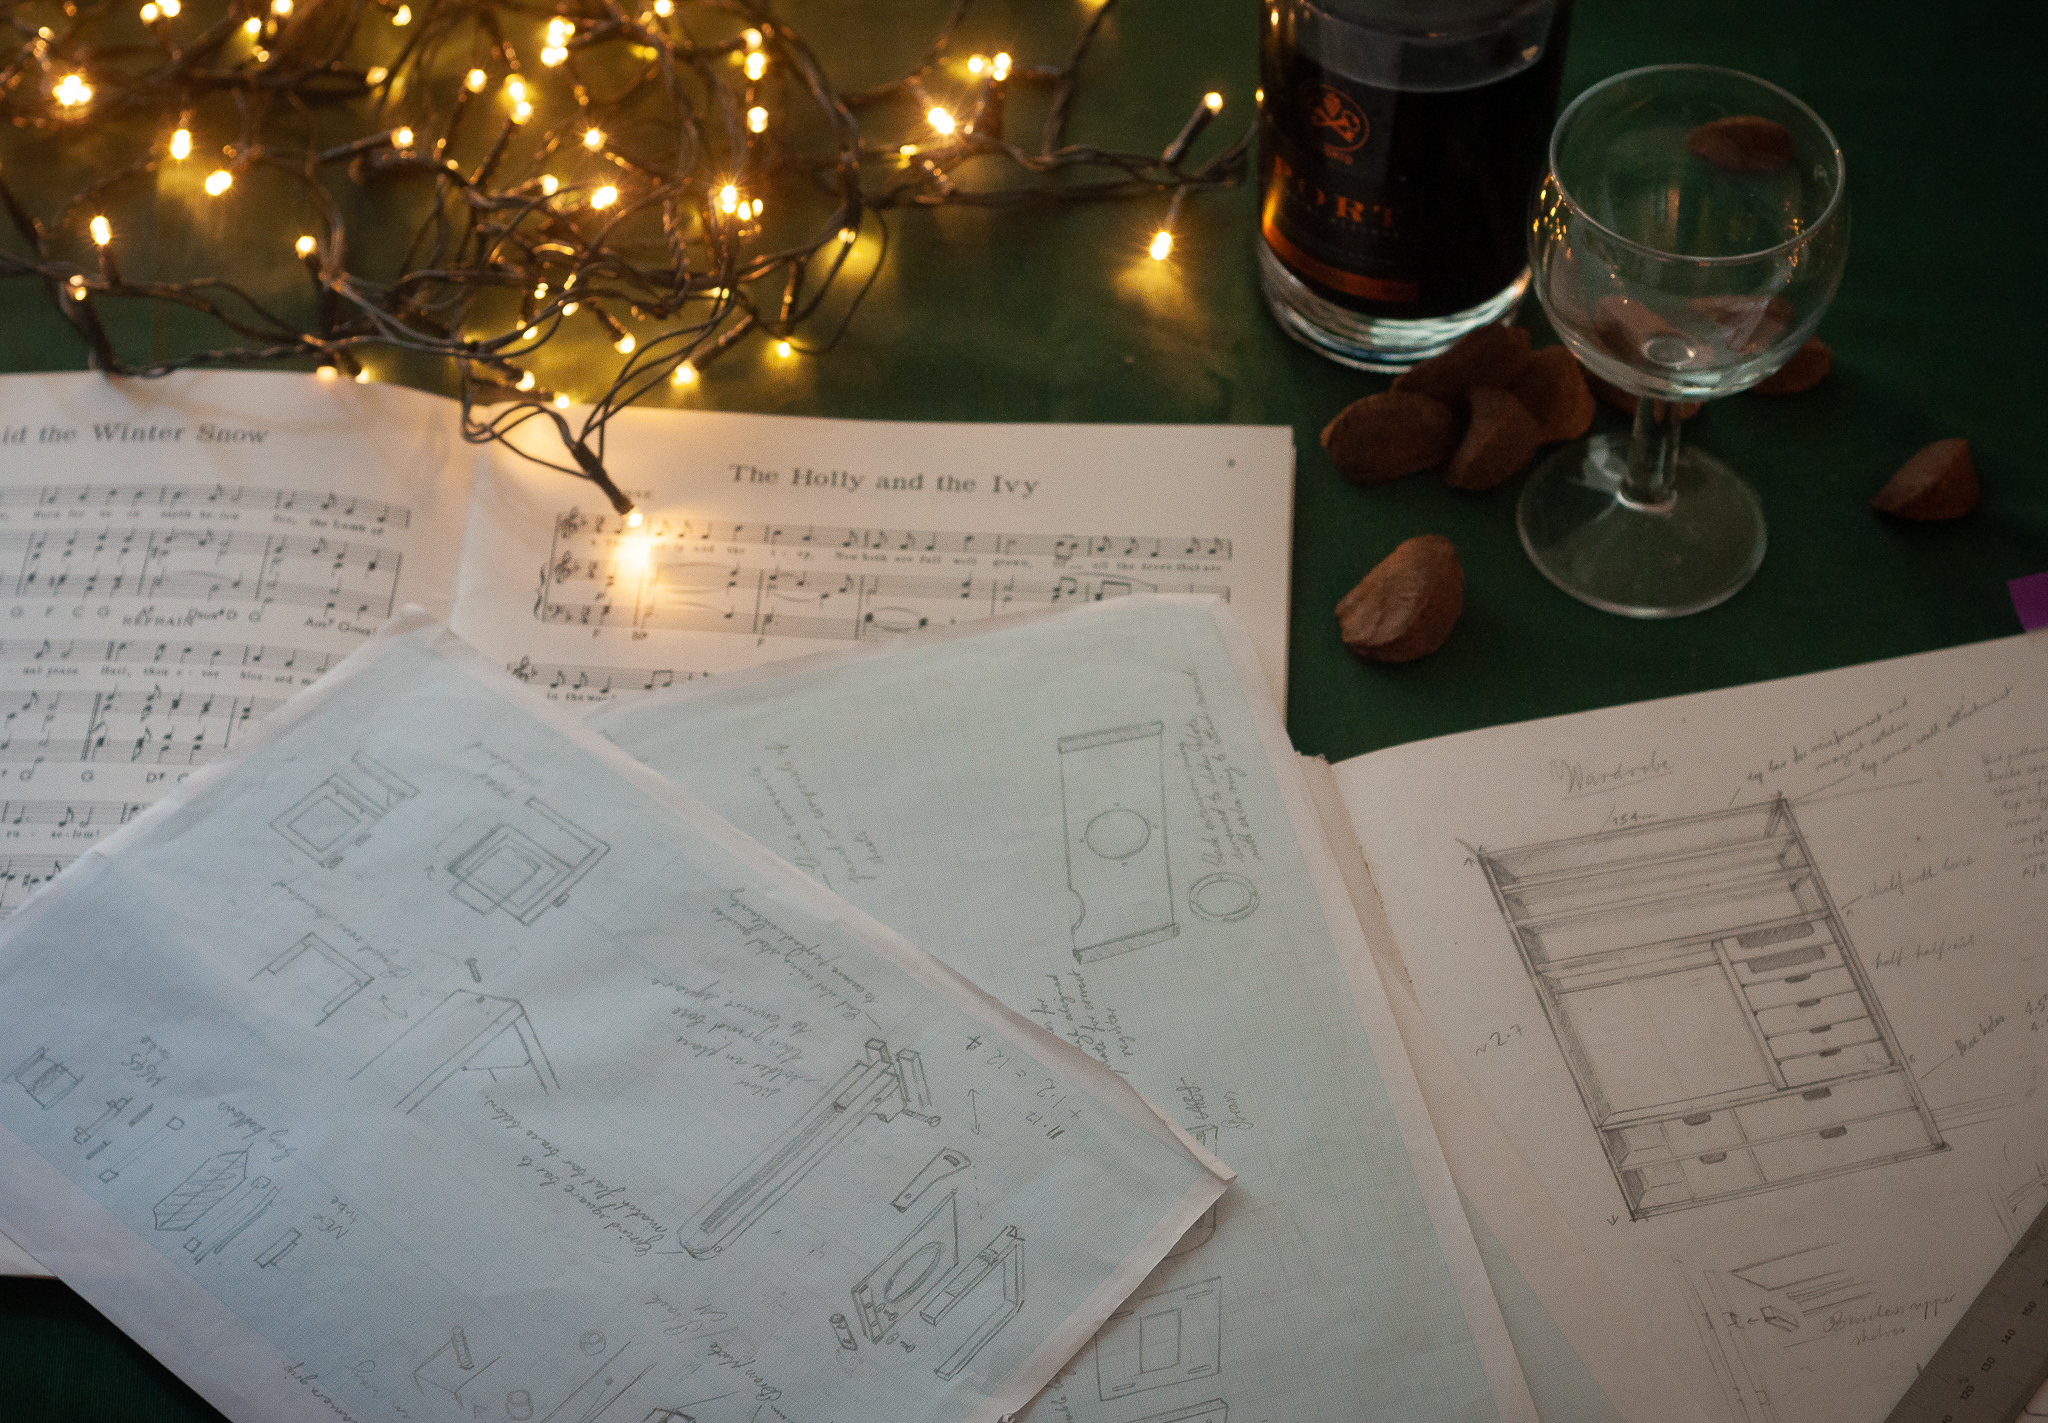
With my children home for the Christmas holidays, I was left with early weekend mornings to go out photographing and late evenings to think about cameras. I decided that I’d definitely need to build something from scratch, and began sketching some concepts. If I could just improve on the back shift mechanism and put together a basic lens mount, I’d be on to something.
What I’ve always wished I could do with the Mirex adapter was to shift both horizontally and vertically in the sensor plane – this way I could simulate a far larger imaging area but also apply camera movements separately. I do have a shift-only adapter (Canon to Mamiya) attached to the Mirex tilt-shift which enables front rise and fall, but if I use this to create another row of stitched frames I can’t also use tilt without one row being shifted out of the focal plane, and front rise creates imperfect matches for stitching owing to the tiny change in perspective from one row to the next. I also missed ground glass viewing and the ability, some would judge essential, to carefully view the final image before exposure. I decided I’d use a chopping board. I’d always thought these to be a good source of durable plastic for engineering projects, and I knew they could be sawn and drilled easily. There are often packs of discounted ones in the middle of Lidl.
Wardrobe
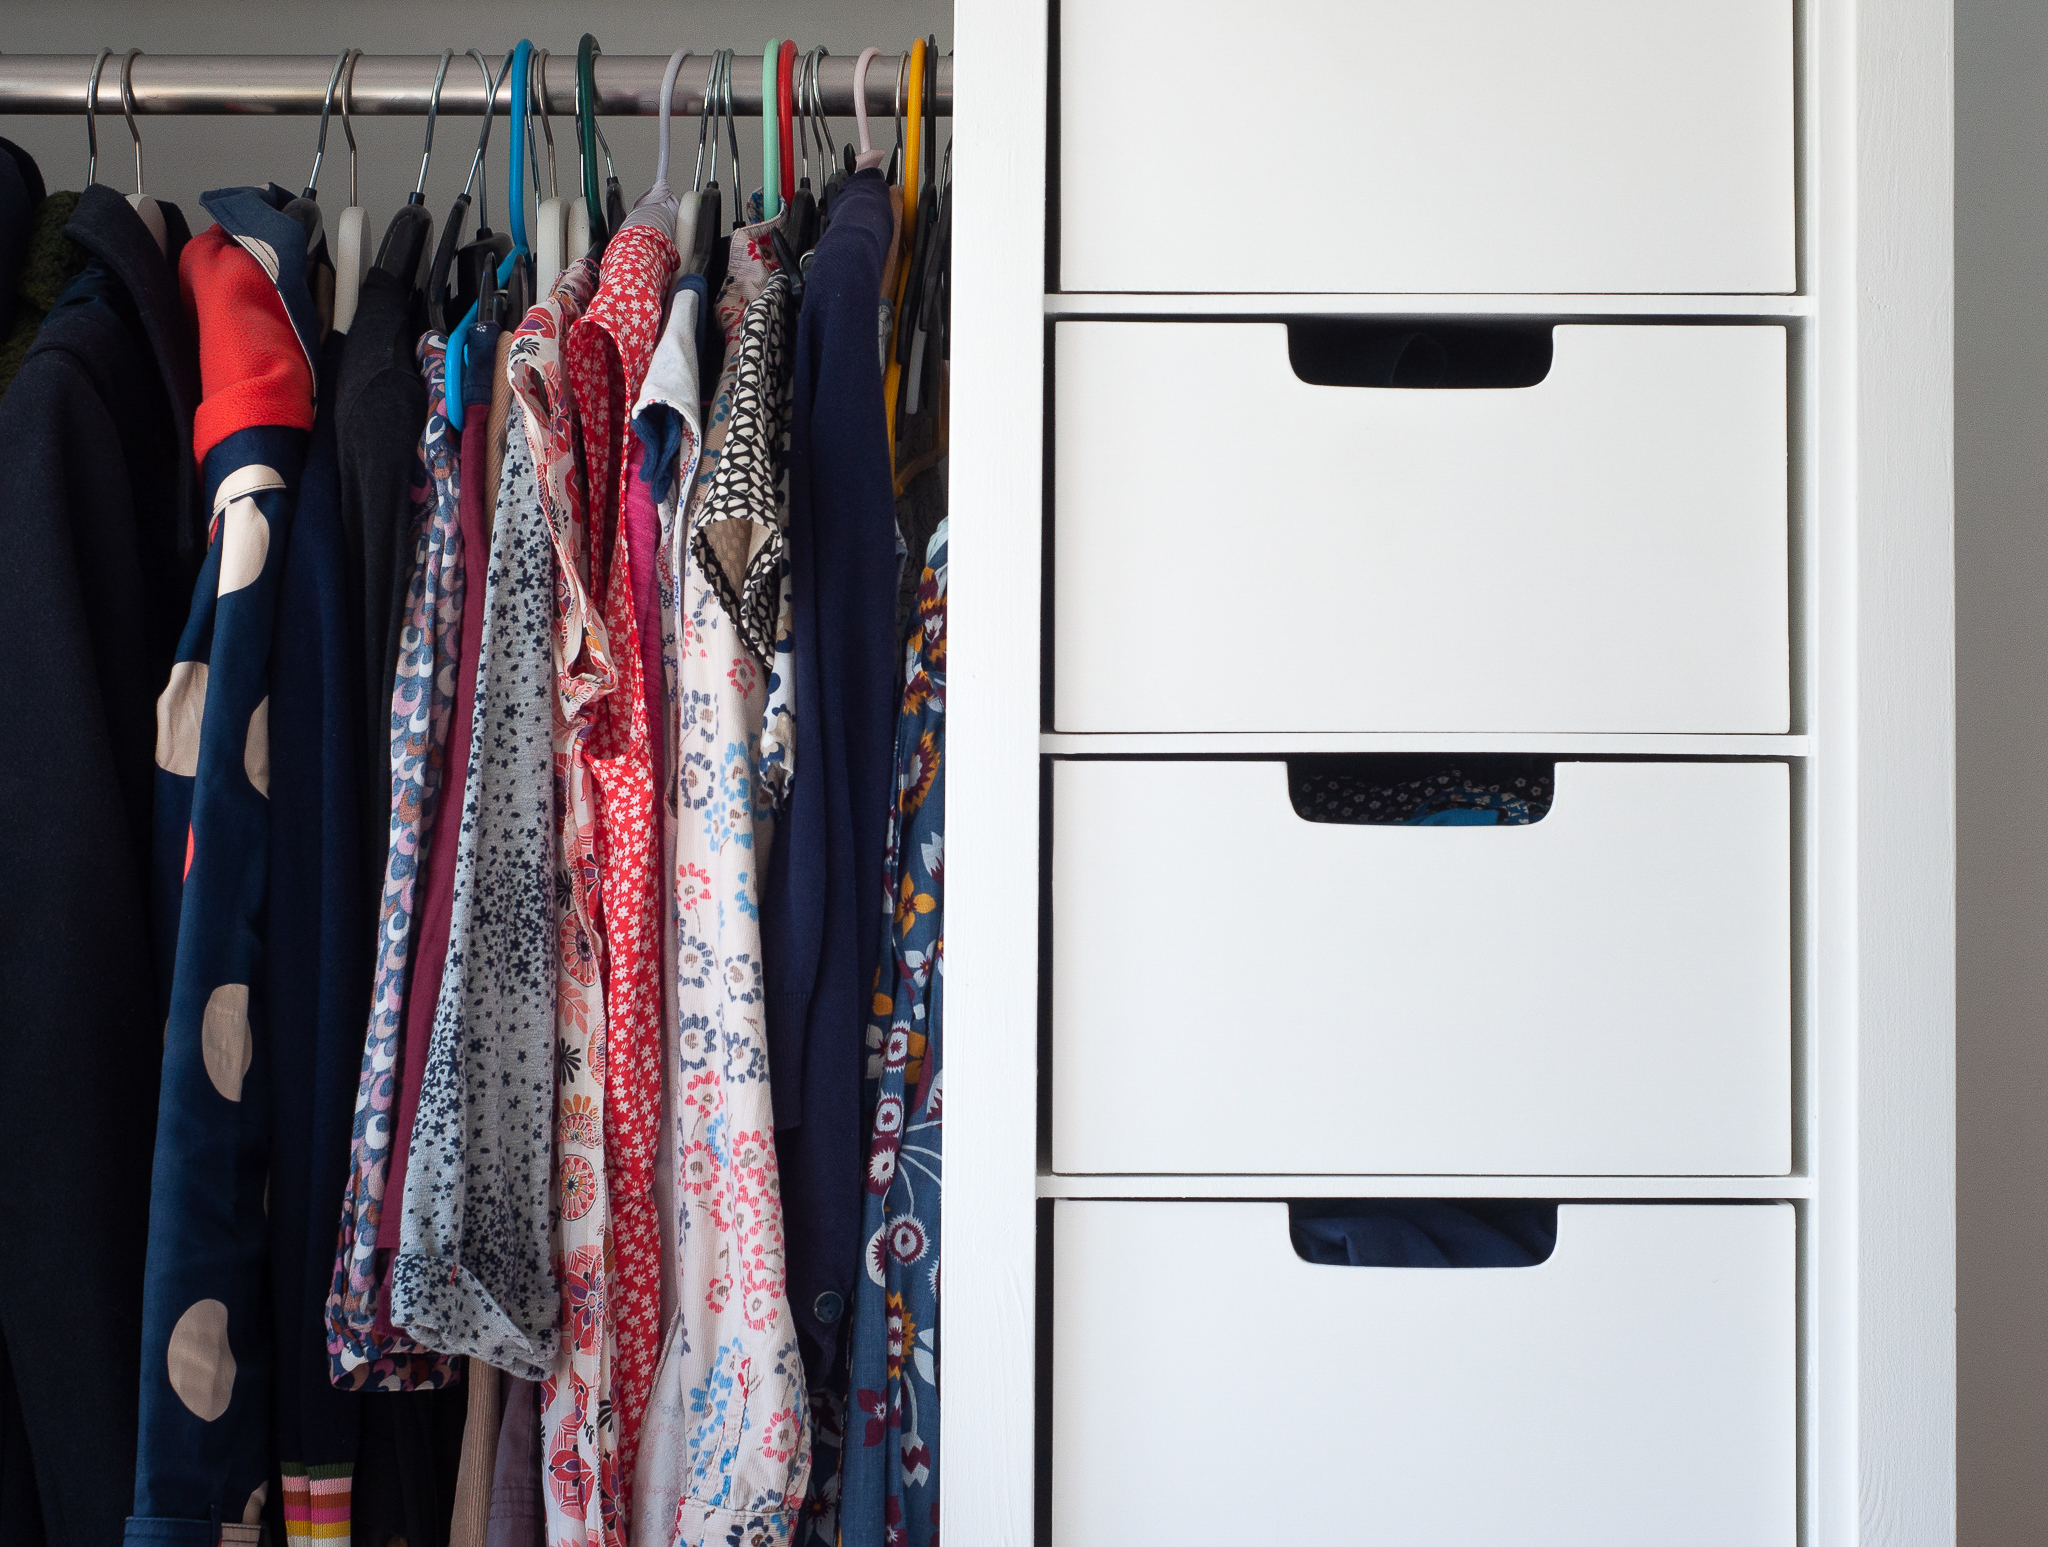
We’d recently moved house and I’d promised a built-in wardrobe. Bespoke wardrobes can cost thousands of pounds from even fairly low-end joinery firms, but I do like an engineering challenge. On opposite pages in my sketchbook from the camera designs, I quickly put together some concepts and explored configurations of drawers and rails. I opted for a monorail design and planned box-like drawers with a basic sliding focus mechanism to maximise socks per inch. I’d quickly put together the camera and then get to work on the wardrobe.
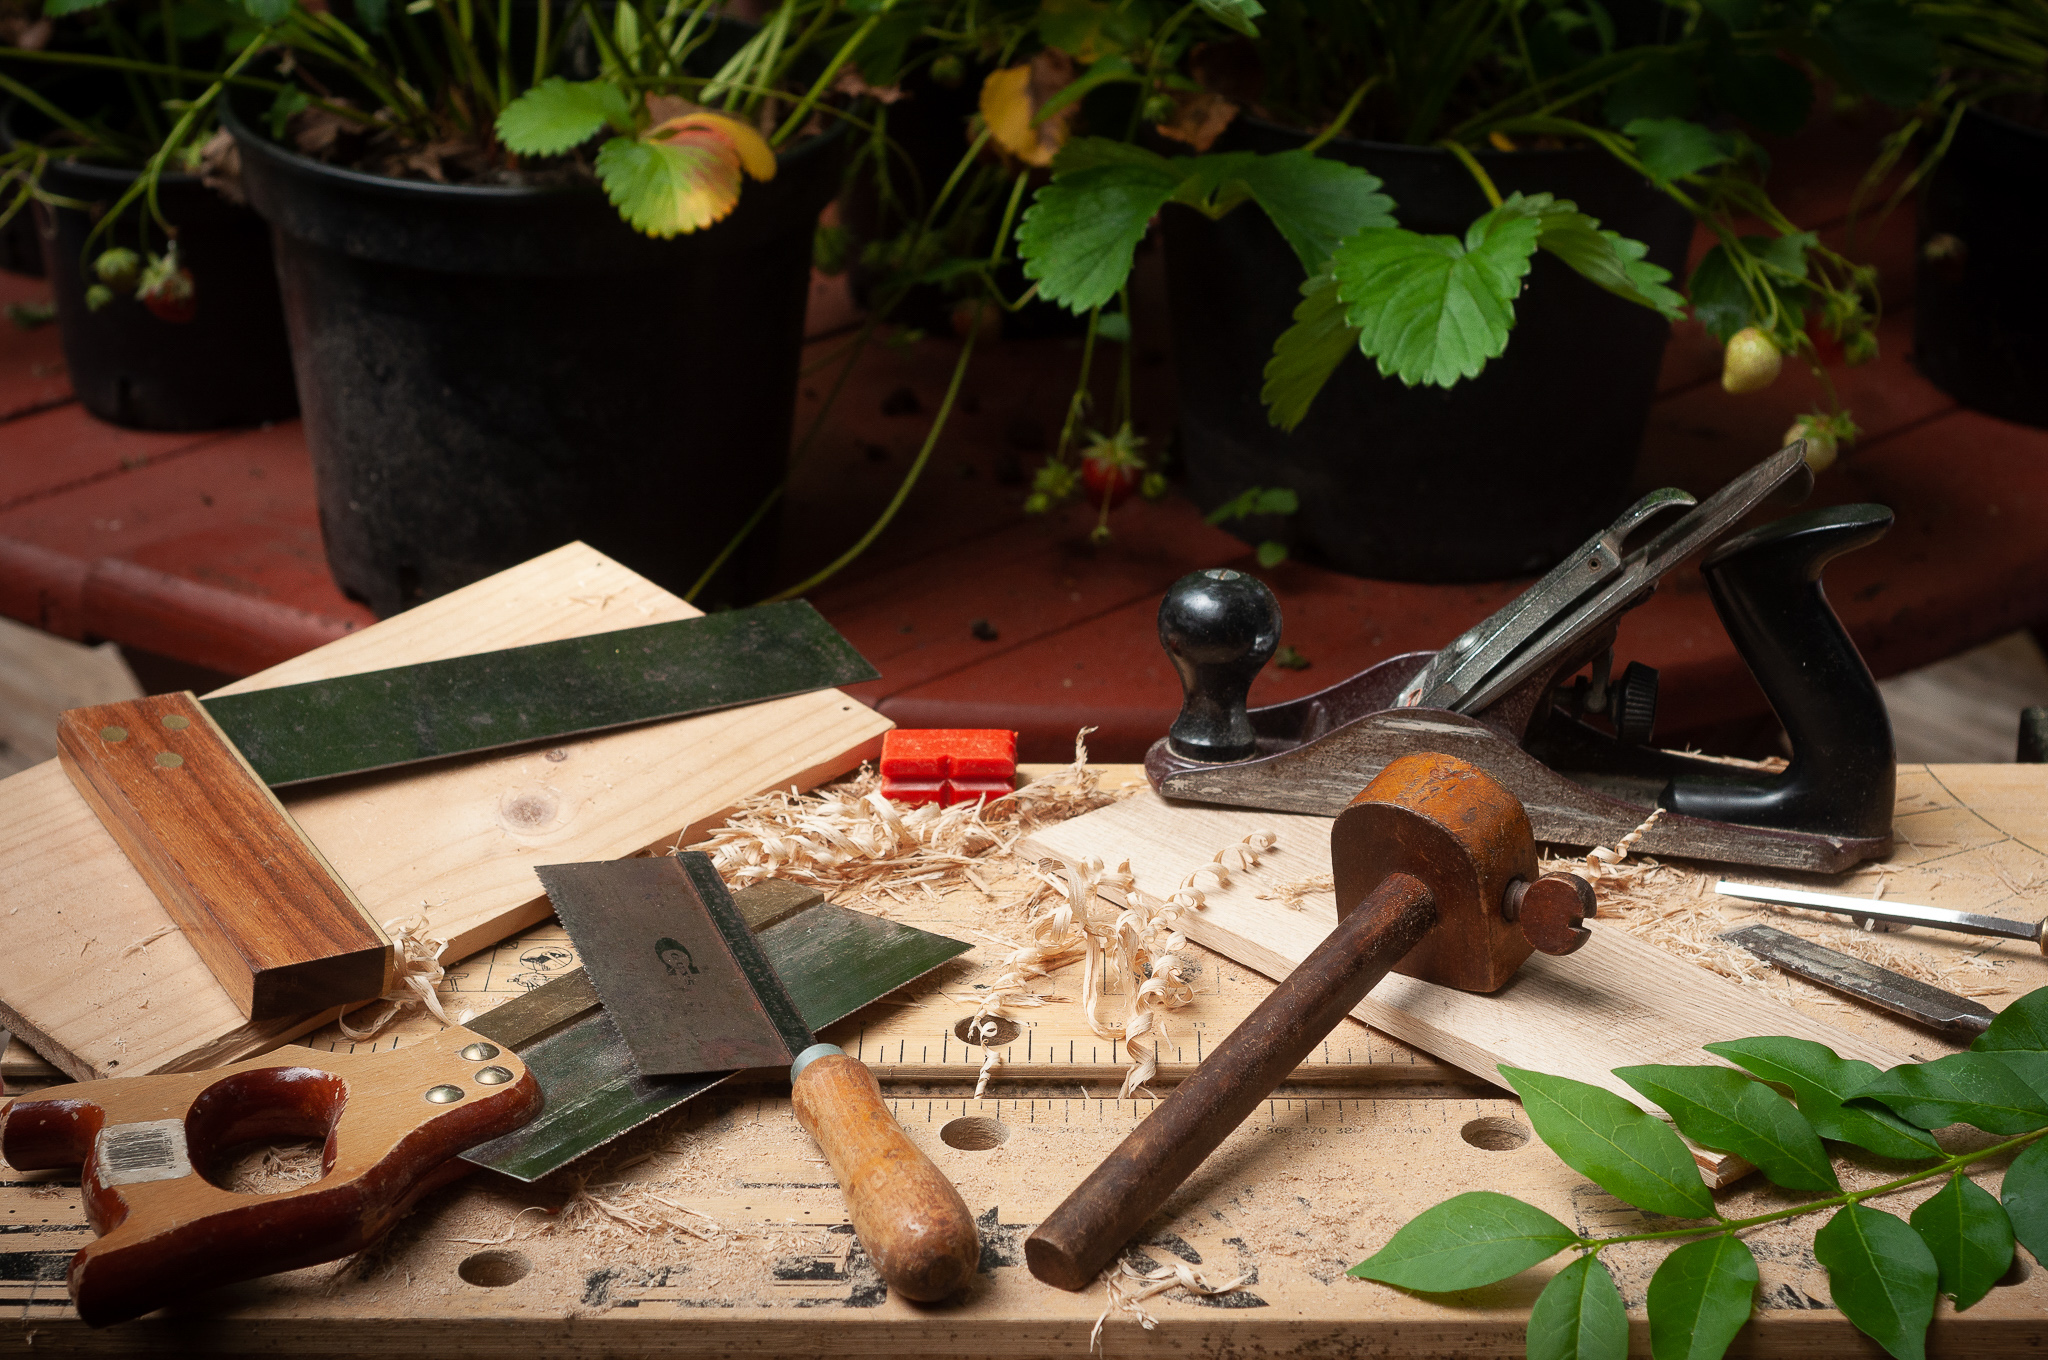
After a week or two of edging around boxes of clothes, I agreed to build the wardrobe first and put off the camera. It was probably for the best and in any case, I’d probably enjoy the woodwork. Always committed to using hand tools, I invested in a second-hand plough plane to cut grooves for shelves and sharpened my chisels to a highly polished edge. The Christmas holidays were coming to an end and I’d soon have hours every day to get the wardrobe finished and move on to the camera, given that my normal music teaching was clearly going to be on hold for some time.
Home School
Unfortunately, the holidays didn’t come to an end and as some of you may have experienced, homeschooling isn’t always the most rewarding occupation. At times the home pupils lost focus and the resolution to continue. With steamroller-like determination I continued with the wardrobe, picking up chisels in the morning and putting them down seconds later when someone would scream “Papa! My sister’s not sharing”. Nevertheless, a wardrobe emerged from the ruins of the early year and with some satisfaction, I managed to cut accurate rebates in Baltic birch plywood using the plough plane. It’s vital to pre-score the cuts though.
Winter
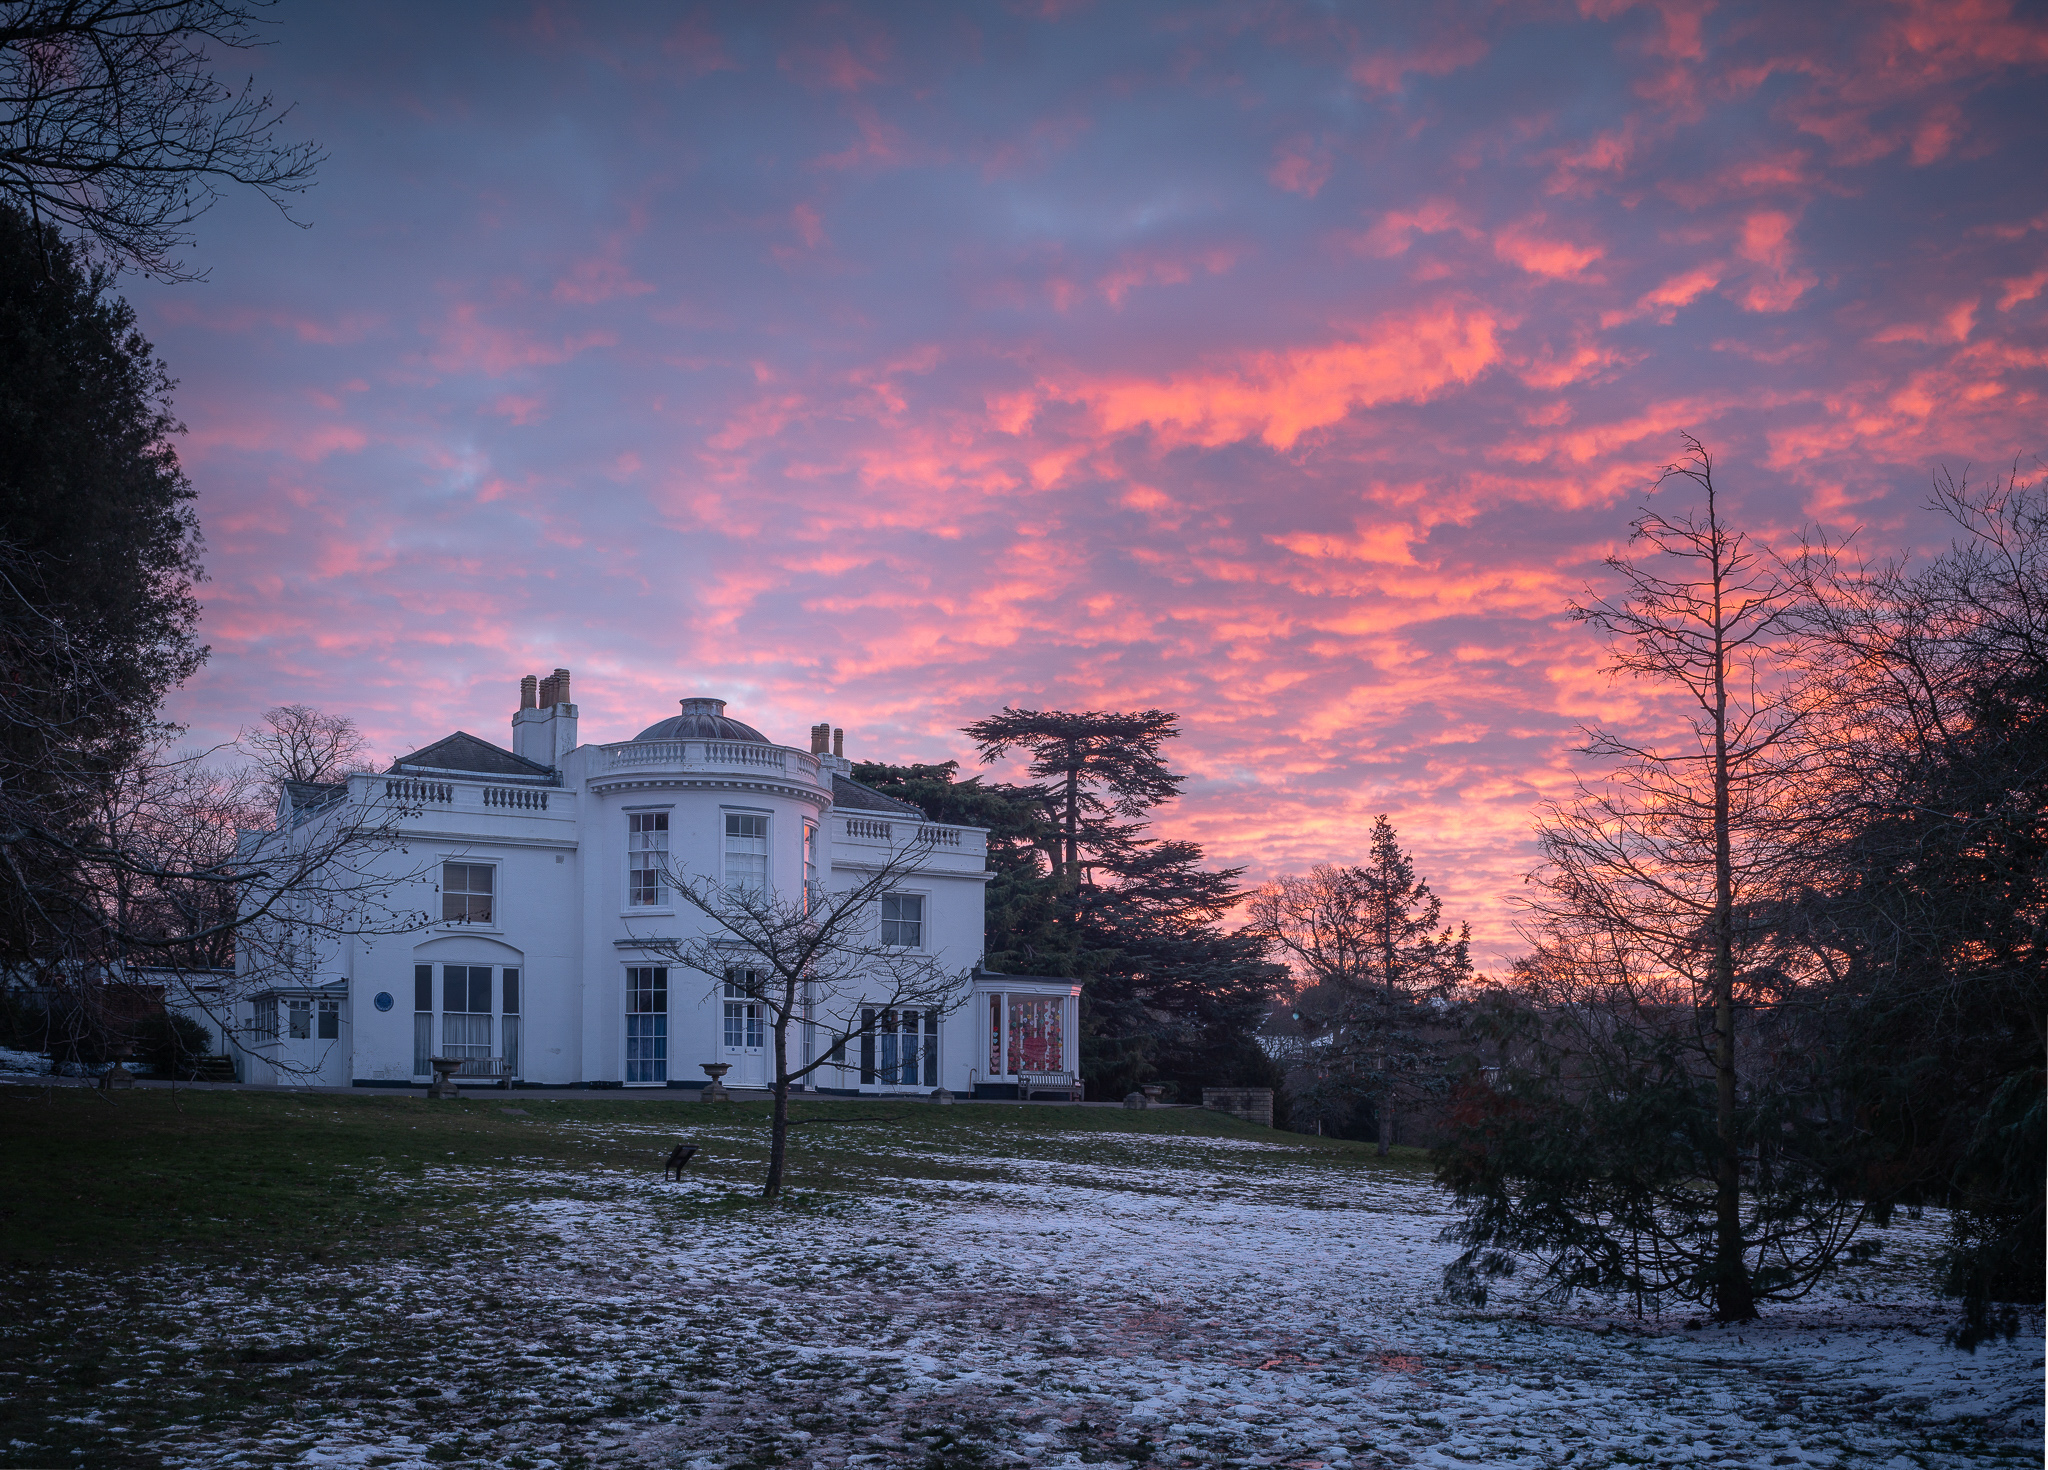
Winter Dawn, The White House, Norwood Grove
The snows of February blew in with welcome vehemence. My recurring photographic nightmare failing to materialise, I had time both to photograph and to tow excited infants around on a sledge before the meltdown returned. Despite very favourable conditions and what I knew would be at least a few good results, I found the snowtography less satisfying than hoped. I’d already designed a better tool in my mind and the one I had to use in the meantime didn’t seem very elegant anymore. Of course, I couldn’t expect winter to last as long as my camera building would take, so I needed a new target.
This had to be my annual pilgrimage to the Isabella Plantation. I’ll write about this project at greater length if anyone feels they might read it, but briefly, this enclosed woodland in Richmond Park is planted with an extensive collection of azaleas, rhododendrons and exotic trees, and around the beginning of May (depending on the early spring weather) the entire forest is illuminated with multi-coloured blossom. I’ve photographed there every year except 2020 and still feel I haven’t quite done it justice. Perhaps a bigger camera would help though.
Spring
The first cherry blossom emerged in a cool early spring and around the house patches of bright white painted drawers adorned the saw dusted floors. Having opted to forego bearings or metal rails to increase drawer capacity I installed thin strips of a low-friction plastic, acetyl copolymer or Delrin between the drawer bottoms and dividers. This worked well and was a welcome alternative to the often jarring crash of an excessively free-running drawer. I now began to feel a weakening in my motivation to chop up all the chopping boards I’d bought. The newly-sharpened chisels, incredibly useful plough plane and sustained recent practice led me to consider whether a wooden camera might not be more satisfying and elegant.
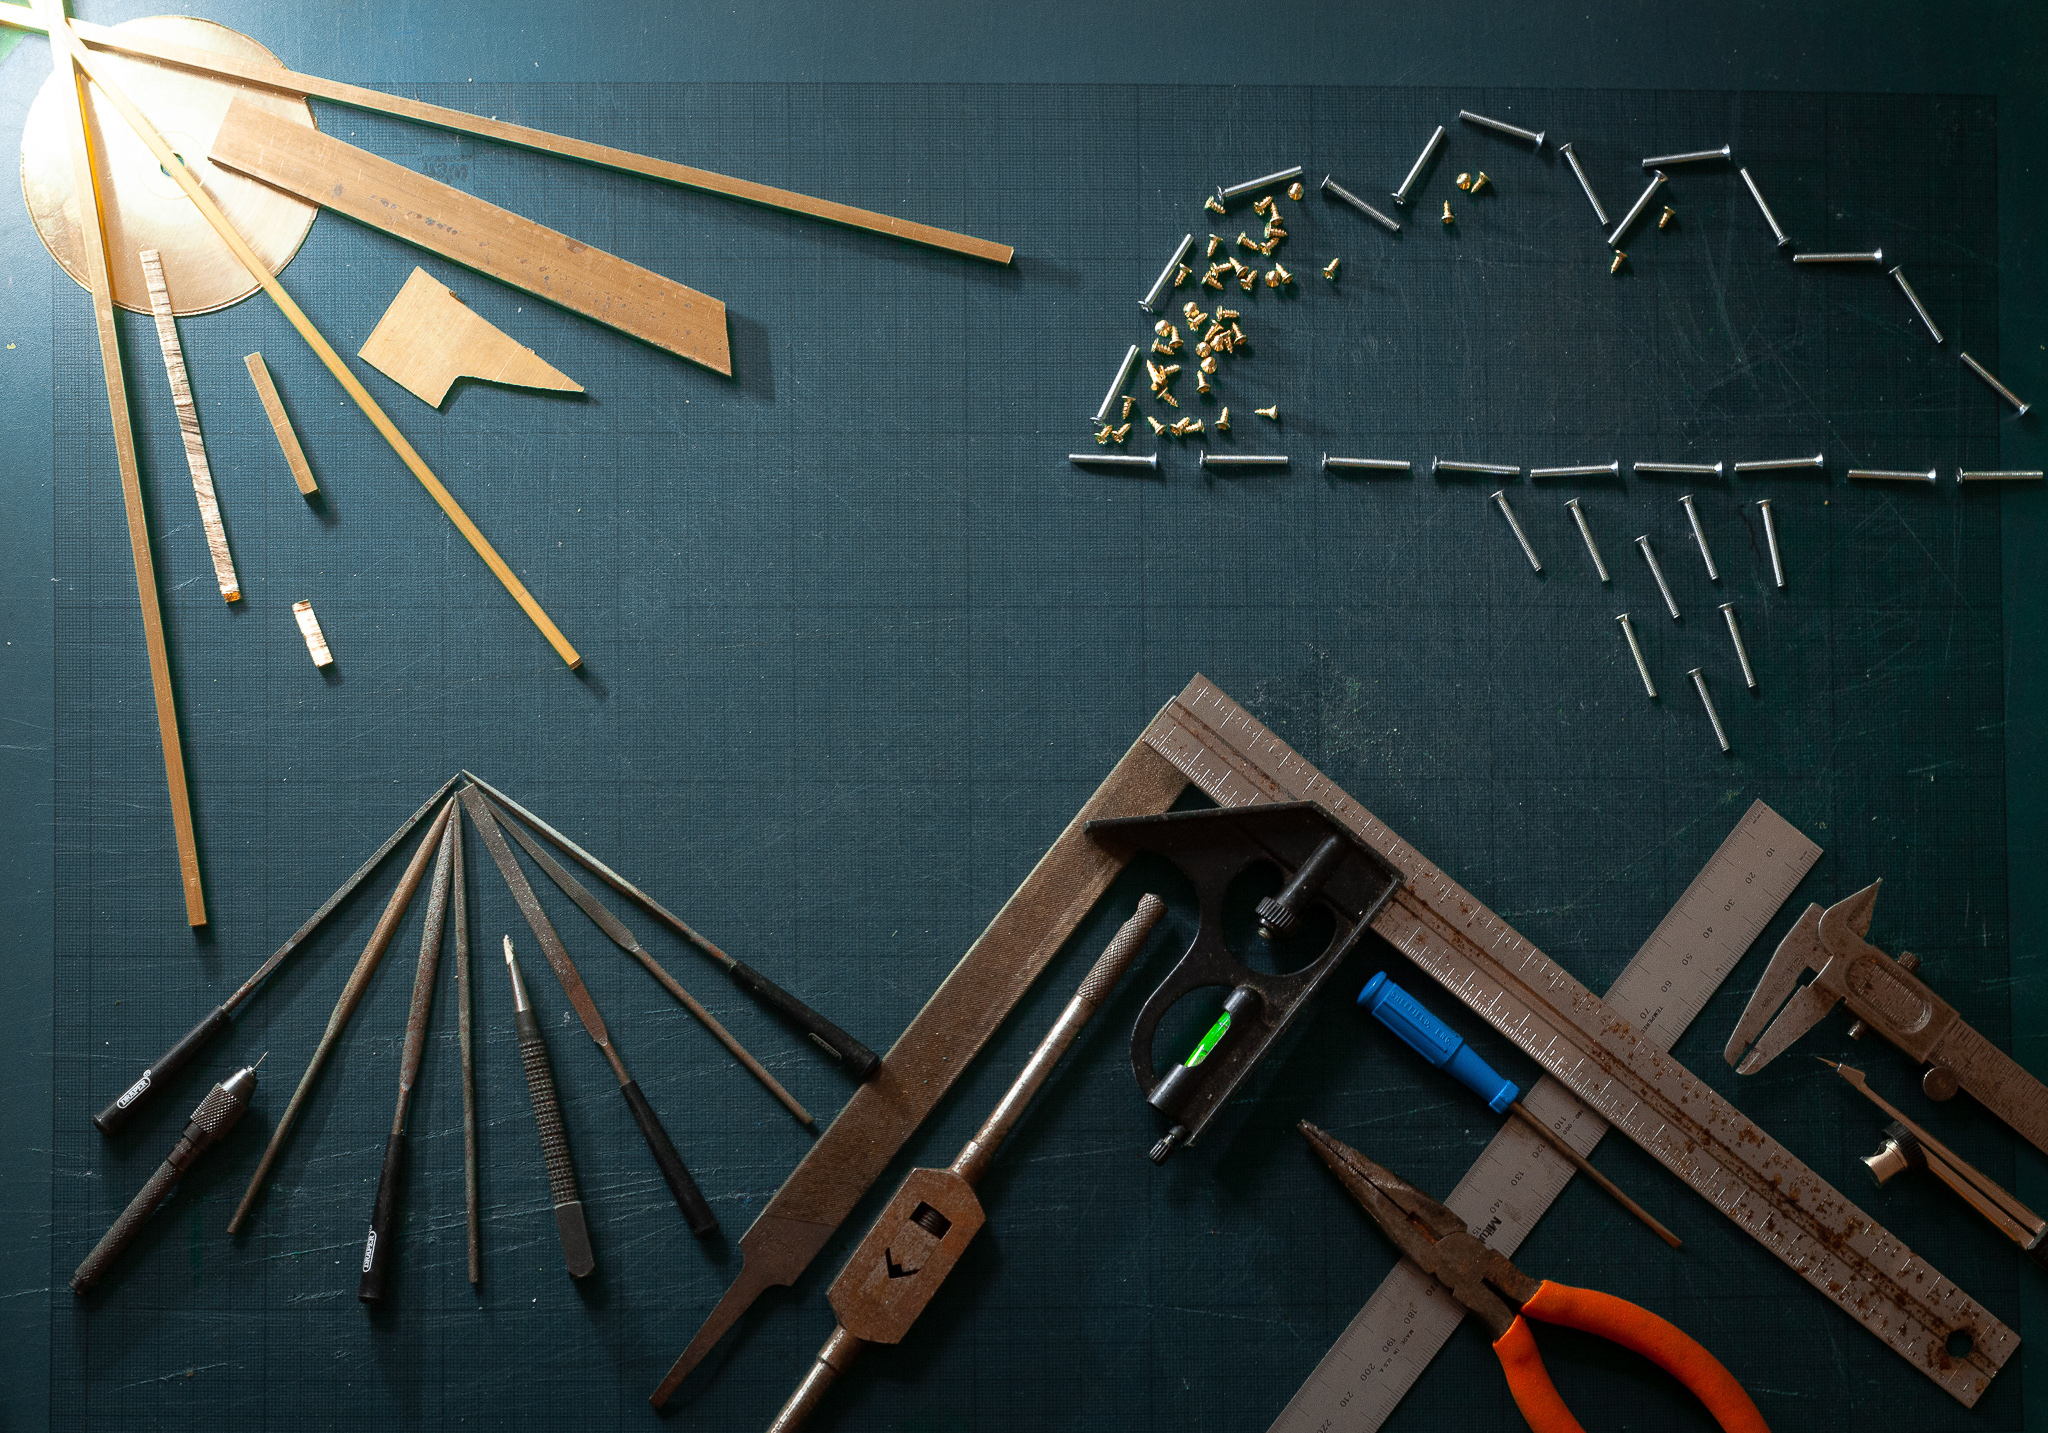
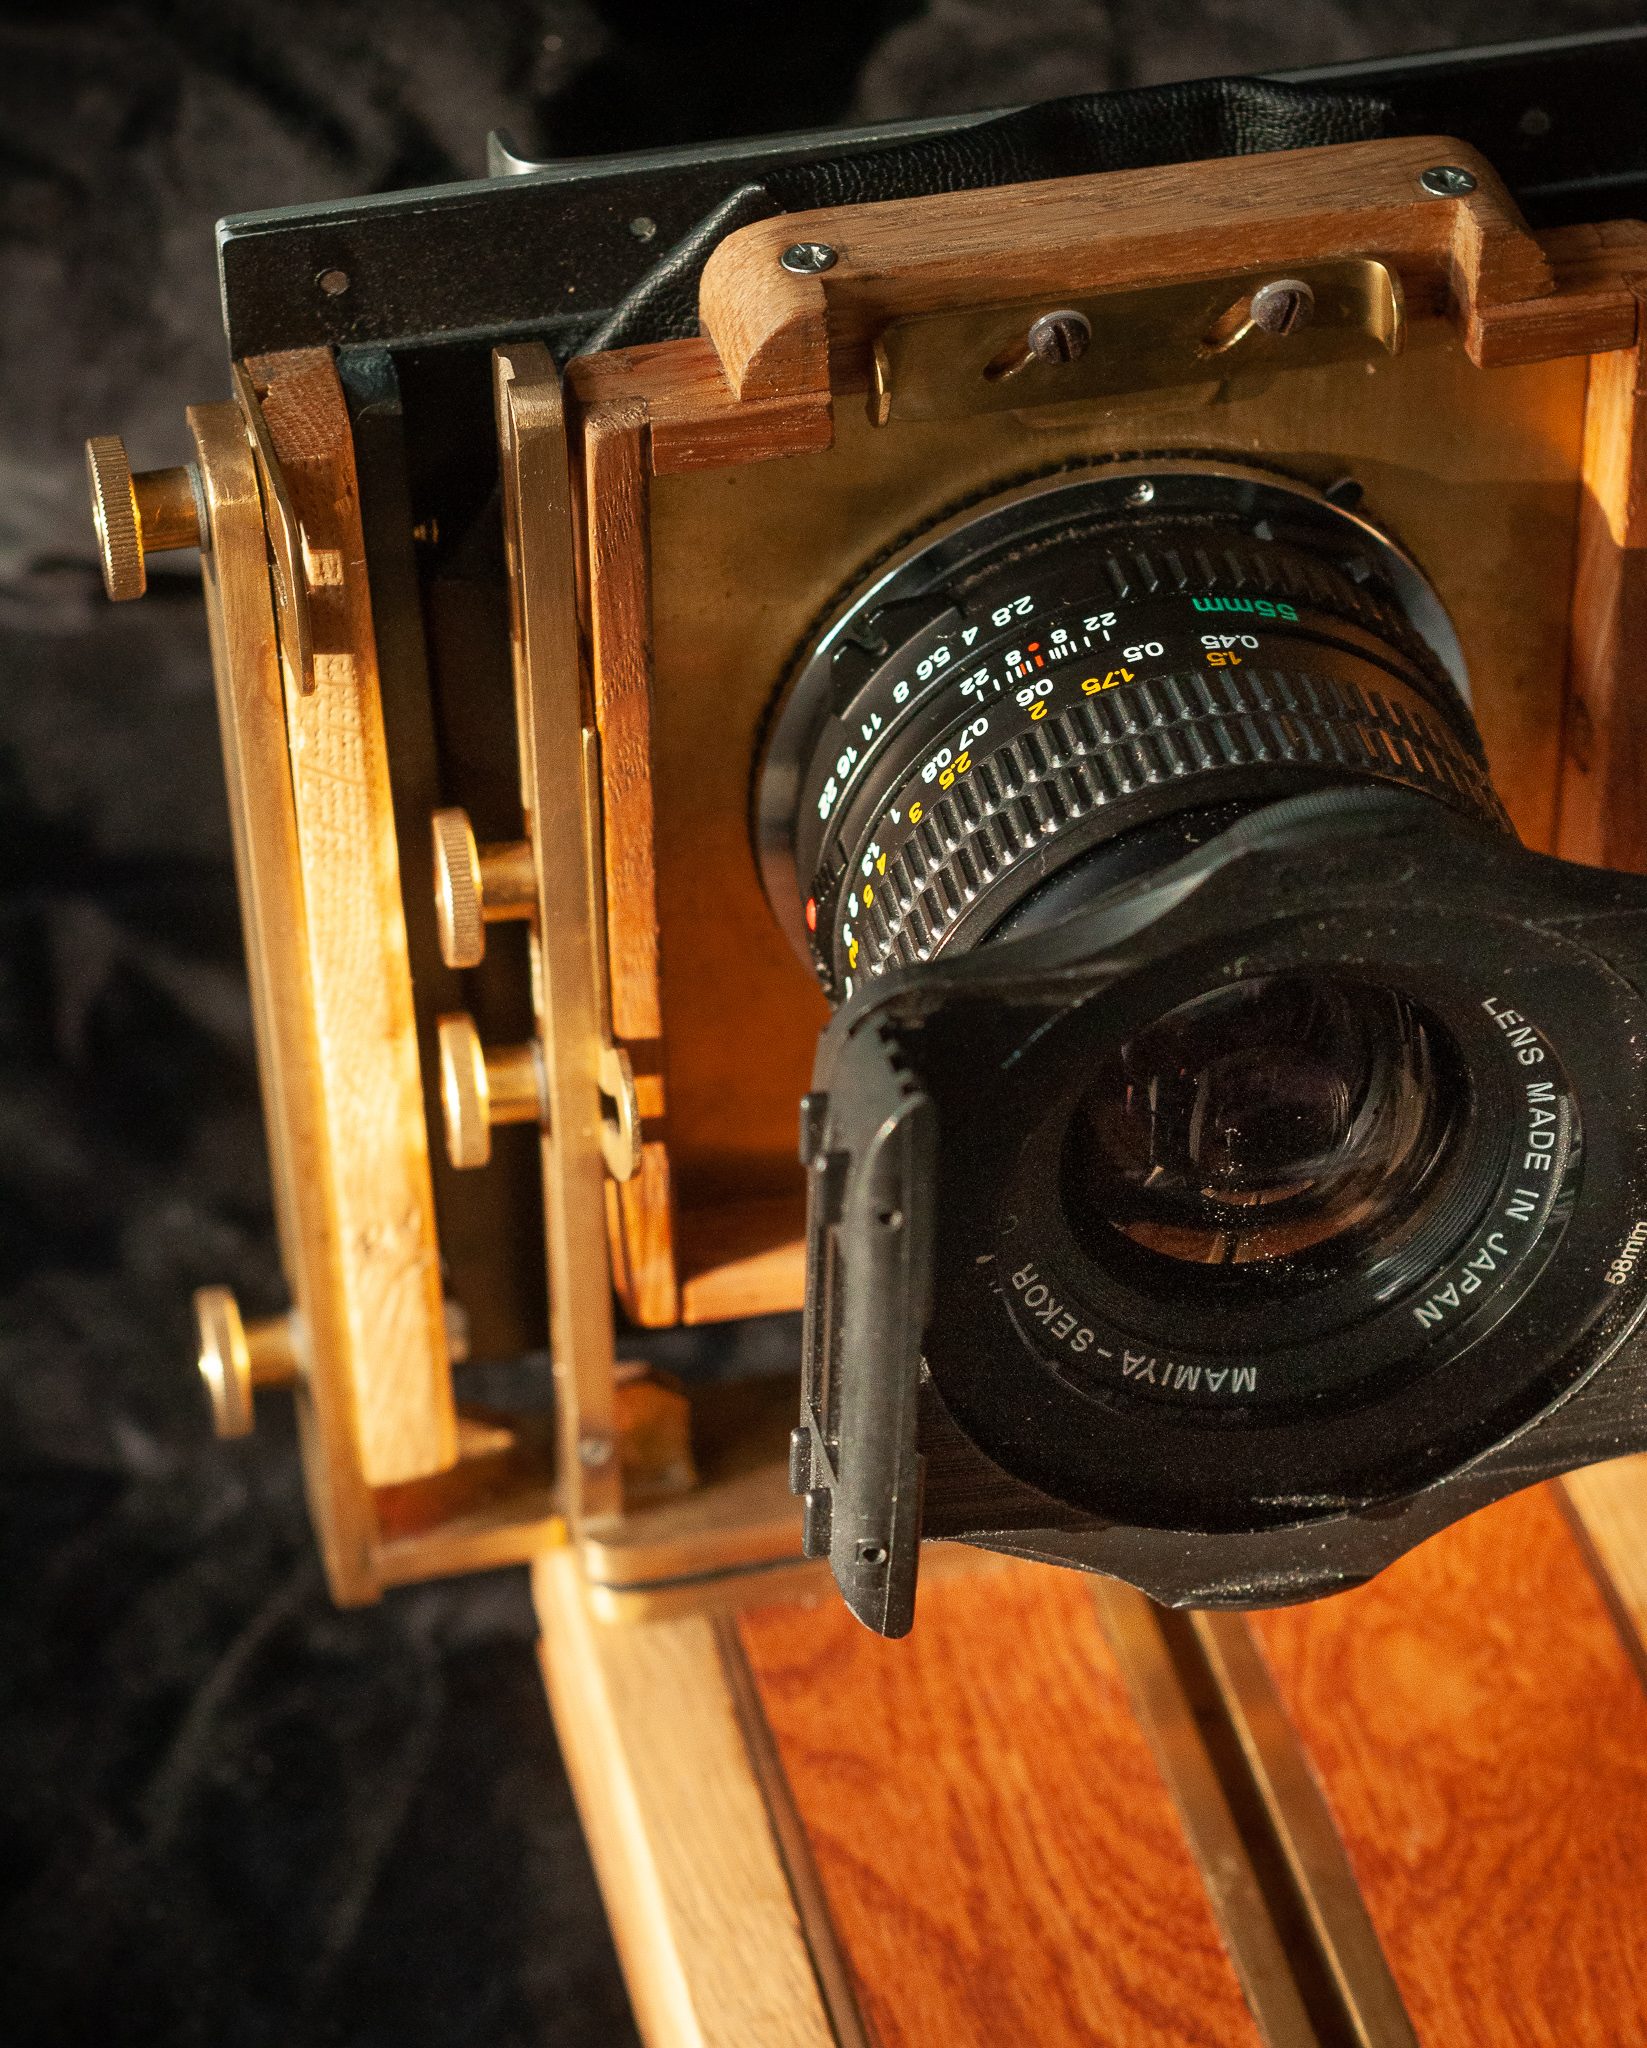
The crippling expense of moving house had brought one bonus – a huge pile of spare oak floorboards hidden under the stairs. The width of the boards seemed fortuitously close to what might work for the bed of a small field camera, and the grain of many pieces was very attractive too. There were to be no half-measures though, and if the base were to be of oak then so too must be the standards and ground glass frame. The rest would have to be brass as this is an attractive metal I had some experience working with, and using a mixture of soft soldering and tapping and screwing, I knew I could fabricate whatever parts were required. As a source of raw materials, I found two or three model engineering suppliers, all of whom sell metal sections for builders of miniature steam locomotives. I did every now and then rifle through a skip, considering whether an old Ikea bracket or fragment of angle-poise might make for a quicker and easier ready-made part, but in the end succumbed to the desire to do the job properly and make everything from scratch. I cannibalised as little as possible, but for the camera mount I used part of an abandoned Kipon tilt-shift adapter and for the lens mount I bought a short Mamiya 645 extension tube.
At the last minute I replaced some parts in the design with stainless steel, conscious of how precisely the sliding back would have to fit, and rapidly learned some basic silver soldering (i.e. silver brazing) technique in order to join the brass components in a more durable way. The chopping board was used for one component, the base of the sliding back assembly, into which the moving parts would be screwed.
Fabrication
Metalwork
I like the word fabrication as for me it evokes a sense of meticulously shaping and assembling carefully-considered components. I fabricated for some weeks, following my carefully-considered agenda of part assembly that would allow dimensions of subsequent parts to be re-assessed as necessary.
I began with the sliding back assembly, whose concept determined much of the camera design. The Sony A7RII may have a short flange distance (sensor to lens mount) but it definitely wasn’t designed as a digital back for a view camera and the large hand grip was a real pain to work around. I could just imagine the Sony engineers thoughtfully pondering the ergonomics of the miniature camera, making sure it fitted comfortably in the palm of one hand as the athletic photographer deftly negotiated his or her emaciated and tattooed subject, craning here, crouching there, leaning out of windows and hanging off trendy cranes. Didn’t it occur to them that we’d all want to screw it to a massive oak plank?
After weighing up the various limitations I opted for a small vertical and large horizontal shift achieved by mounting the camera on a wide steel plate sliding in horizontal rails and a simple set of screws sliding in slots to raise and lower the rear section. The camera would remain in portrait orientation, yielding “virtual” formats of around 36x80mm (a panorama of four or five frames shifted horizontally) and roughly 6x4.8cm (two rows of three shifted by the maximum vertical distance the design allowed before the grip got in the way). As has always been my simple aim with digital stitching, this gives similar proportions to 5x4” and 6x12cm, my favourite film sizes. These rear movements are solely for stitching, and working to similar concepts as used in commercially-made non-folding film cameras I designed straightforward mechanisms for front axis tilt, rise, fall and swing and rear base tilt. Keen to have one of the only cameras able to use both medium and large format lenses, I guessed the amount of shift that might be possible with a 5x4” lens, thinking it best to have too much rather than too little. To the same end, the front standard was designed to accept a standard 5x4 lens board, and then the Mamiya extension tube was attached to a brass plate of the same size so that it effectively became a removable lens board for all my Mamiya and Bronica lenses. I could have made the front standard smaller if only using the medium format lenses but I wanted to be able to at least use the Schneider 90mm f/5.6 as well, which required a much larger opening.
Thoroughly confounding anyone who might have thought they knew what the job of building a camera would entail, I ordered a set of vermiculite firebricks and constructed a makeshift brazing hearth in our barbeque. The silver brazing went well despite my blowtorch being a little under-powered for the weight of some of the brass sections in the back, and suddenly able to join almost any ferrous or non-ferrous engineering metal (other than aluminium) with weld-like strength I felt invincible.
Fire, rain, wood and metal bring a similar sense of connection to the outdoor world that I try to evoke in photography, an earthy mix of growth, decay and rural simplicity. This would be a camera born of gentle fire, trees, and a 17th C level of technology, sawn, filed and polished with such tranquillity that the robin on the garden fence would feel happy to sit and watch.
Haste
The sun was shining on the workbench and I fabricated in t-shirt conditions, to the continuous background sounds of the woodpecker and blackbird. With this clemency came a new haste though – would the Isabella camera be ready in time for Isabella at her best? With impatience fighting perfectionism, I paused at more than one point, considering whether temporary sections in MDF might not save me enough time to ensure nothing was missed of the precious pilgrimage. All I could dream of was my date with Isabella, and the distant, languid late spring spent photographing at leisure with whatever luxurious refinements time would bring to the camera, was impossibly far off. A kind of hurried perfectionism won and I planed on, thin oak shavings carpeting the garden with sandy hues and pleasant perfume. The rack and pinion focusing mechanism was a little tricky to construct and unable to obtain brass components I ended up used nylon ones for this largely hidden part, which are less durable and precise than I’d like but which I’ll replace later. I cut grooves for the focus mechanism with the narrow cutter on the plough plane.
Curtains
With some disbelief, I finally arrived at the point of tackling the bellows. Everything else seemed to work, albeit in a slightly sticky and recalcitrant way, but it was still difficult to assess photographic performance at this stage. I rummaged through boxes with feverish cannibal eyes, putting numerous perfectly wearable garments in jeopardy – waterproof trousers, a black shirt, a velvet tie. All were held up to the sun, laid out and measured. Then I remembered the black velvet curtains I’d refused to throw away when we moved into our old flat – clearly as vitally useful a photographic backdrop as they were Goth furnishings. The velvet side went on the inside and the bag bellows were made in two halves, hastily joined with superglue and un-hemmed seams. A masterful 17th C tailor would have been aghast. Until the first real test, I was convinced that either some unanticipated internal obstruction would mar performance or impossible levels of flare and internal reflections. I used matt black barbeque paint (as recommended by telescope makers) for inner metal surfaces and the velvet bellows would help as well, and once again experimenting with new techniques I finished the bare oak with Danish oil, giving a slight sheen and water-resistant finish.
Finally in a frenzy of tiny screws and dusty velvet I had everything assembled – everything but the tripod mount. I’d always wondered what the standard size of tripod screw was as it didn’t look metric to my scrutinising eyes. ¼ 20 UNC was the answer, which sounded extremely exotic. In a screw zoo, this one would be hiding behind a log while visitors peered through the glass with disappointment wondering if they could just make out the end of the tail. I picked a nut out of one of my very many boxes of useful things I can’t throw away and tried it on my tripod plate. It spun on perfectly. Quickly, before it dropped between the floorboards or spontaneously metamorphosed into a different kind of nut, I brazed it onto a stainless steel plate and fitted it onto the now-varnished camera base.
Grinding glass
I stand by my collection of moderately sized things that don’t work – from an old security camera I picked up a year ago, I took, in addition to many tiny gem-like achromatic lenses for telescopes, microscopes and hoarding, a flat piece of glass, about 8cm square. I ground it cautiously on some sandpaper – not a scratch. I tried wet-and-dry paper, both dry and wet – still perfectly clear and scratch free. Why are photographers so worried about scratching their lenses? Finally, I rubbed a coarse oilstone on it, reflecting as I did so on all the photographers nervously eyeing up pristine, untouchable cameras in camera shops, things of desire and lust, to pitifully justify having spent impossible sums of money on. The oilstone left a few deep and unsightly scratches in an otherwise clear field.
I ransacked the house again, looking at stationary. I knew I’d seen some plastic document folders that were white and translucent. In the end, I dug out a piece of stage lighting diffuser which I sandwiched between the scratched, non-ground glass and a plastic Fresnel magnifier. Isabella season was probably past its best and if I was going to get there at all I needed to work as fast as possible. I dug out the remaining parts of one of the chopping boards and quickly put together the ground glass back, in the form of a functional prototype. One of the main concepts behind my design was to make the removable ground glass back so deep that it matched the sensor position, set back by the flange distance plus the sliding adapter. This would mean the actual frame of the camera’s rear standard would be about halfway between the lens and the focal plane, which didn’t seem like too much of a problem. In the end, the grey plastic back looked a lot like the very medium format digital backs that this camera is designed to imitate. Keen to maximise their profit margins, I’m sure Phase One and Hasselblad get through a lot of chopping boards.

I ran some tests in the living room to measure the field of view and make masks for the two formats, and other than a little difficulty obtaining focus across the field with the Mamiya lenses (perhaps I should have done without the front swing) the camera did seem to work. It was slow and cumbersome and needed a plethora of hands to operate, but as I told myself, this was what it was meant to do. I’m sure I felt the same way the first time I tried a 5x4 camera. Finally, I took the back apart again and took the glass back to the wet-and-dry paper in the garden. I ground stoically in the rain for half an hour and in the end, little patches of matt glass grew and covered the screen, pristine like a wave-polished pebble, but for the big scratches left by the oilstone. I re-assembled, emptied my camera bag of clean black gadgets and re-packed it with part of an oak tree, a small fraction of a steam locomotive bound to a chopping board and a group of mismatched lenses that cowered in the recesses, unsure why they were suddenly living together. Then I set my alarm clock for 4am.